The whole kitchen/laundry room floor redo ordeal started with Kev and his friend Jason busting up the old (unevenly laid) tile and (badly stained) grout that held it all in place…
It was a super dirty job…

…but they did eventually manage to git r’ dun.
And like Kev mentioned in a previous post, the machine they rented worked great, but the tile won’t come up unless you break up the edges of it with a hammer first. The same thing goes for when you’re breaking it up using one of these, attached to a reciprocating saw…

If you try to just break it up like this…

…that saw will fight you like the dickens. But if you break up the edge of the tile with a hammer first, it’ll come out fairly easily with the Spyder scraper attachment. (Thank you True Value!)
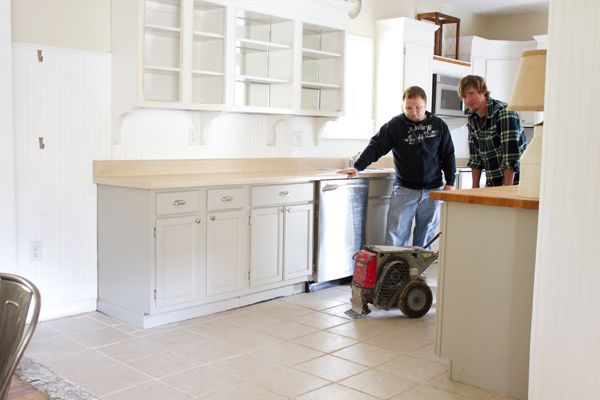
After the tile mess was cleaned up, the guys had to figure out how to remove the thin-set that was previously holding the tile in place…

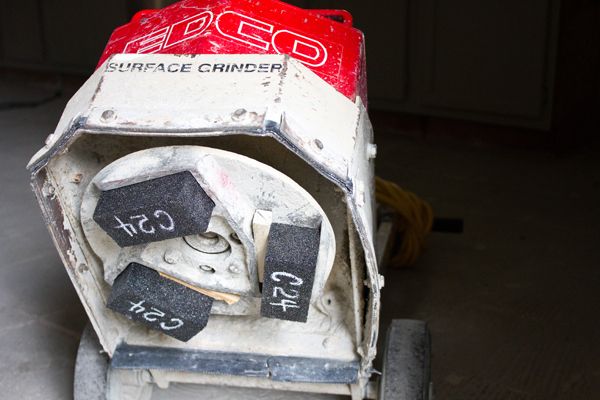
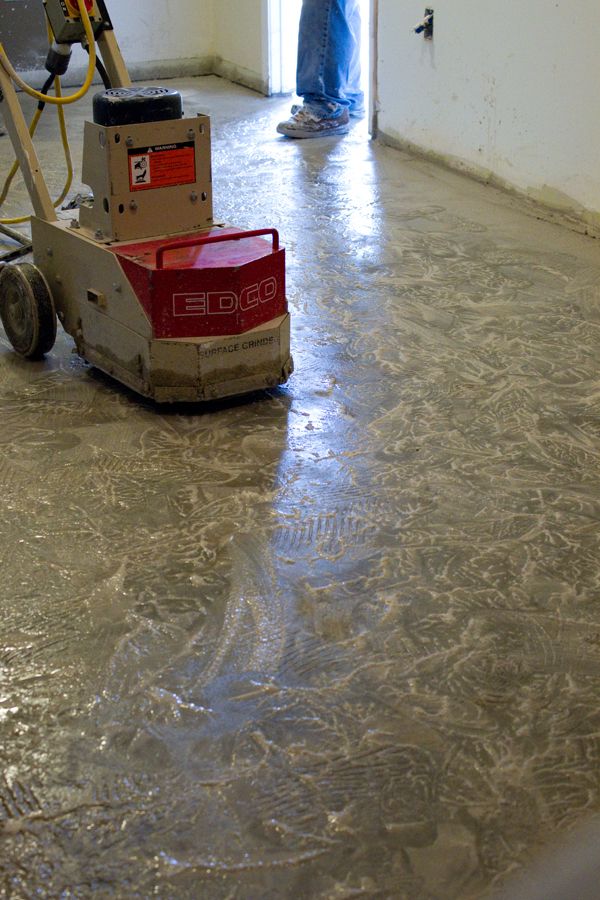
They ended up renting a big grinding machine.
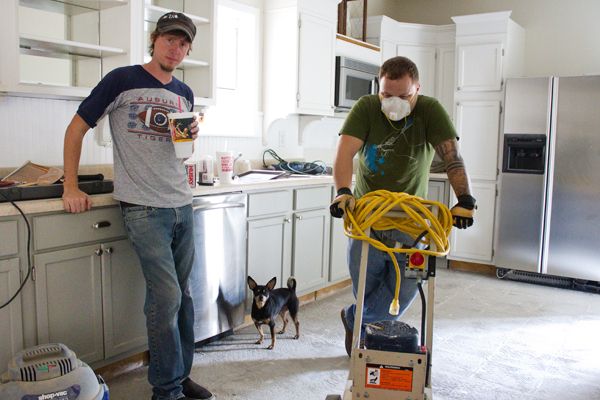
Basically, you wedge three stones into the bottom of it with little chunks of wood (can I get a yabba dabba do, up in here?! Total Flintstones-style, right?!) and then you just grind away!
Oh, but I forgot to mention- you also have to hook a garden hose up to that sucker.
Yeah. A garden hose.
Like, so that water can ease the friction between the stones and the thin-set…or help keep the dust factor down…or something. We’re not really sure…that’s just what the guy at the store told us to do, so we did it.
Anywho- Jason and Kevin were able to get it all ground down…but we did have a lake in the middle of our kitchen for a while there…
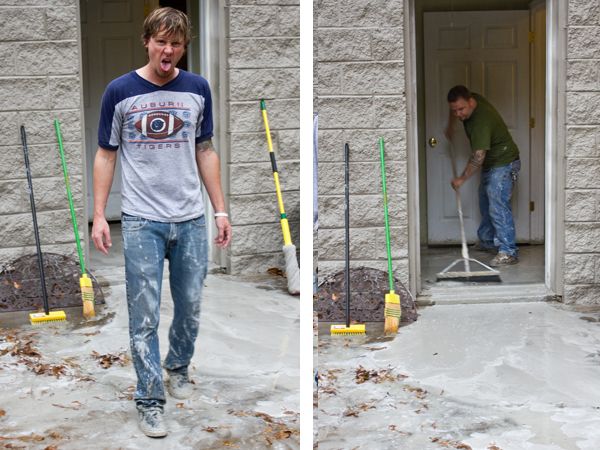
That’s water Jason’s push-brooming water out our side door. Nothing screams, “Cook and do laundry in me!”, more room full of dusty water, huh?

After the bulk of the water was out, we were left with….paste…
Pretty nasty, huh? Kev just kept staring at it and saying, “this is…our kitchen“, and “we just…like…intentionally did this to our kitchen“.

Although it took a couple days to clean up, we did manage to get it ready in time for the flooring guy (Wade) to lay skim coat on it a couple days later…
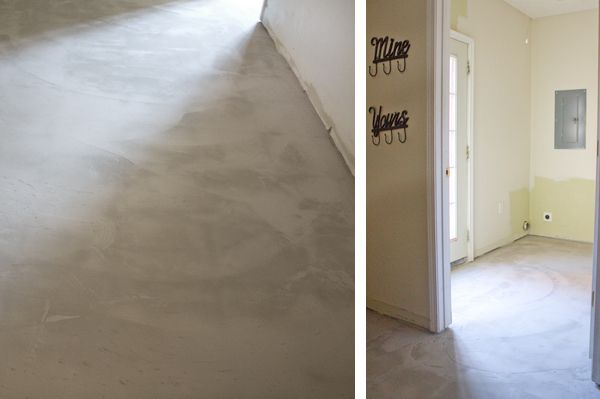
(Please excuse the half-painted laundry room pic- I just got plumb-tuckered out on that project a couple years ago and never got fired up to finish it again. Good thing though ’cause Kev painted it a totally different color (November Rain) yesterday- LOL!)
Wade poured the skim coat on and used a great big flat metal thing to push it around so that when it dried, the whole kitchen and laundry room floor was nice and level.
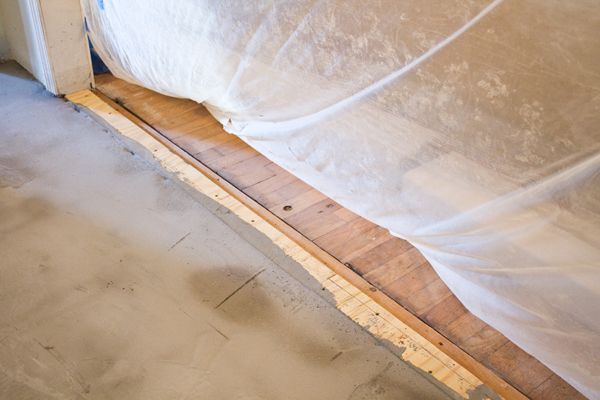
He filled in the “trough” that previously separated the kitchen from the dining room with a strip of plywood…

(Please excuse the refrigerator and kitchen cabinets in our dining room. No matter how hard I try, I just can’t figure out how to make them look natural in there.)
Here’s a closer look at the trip hazard trough that was previously filled with a bunch of broken up concrete…
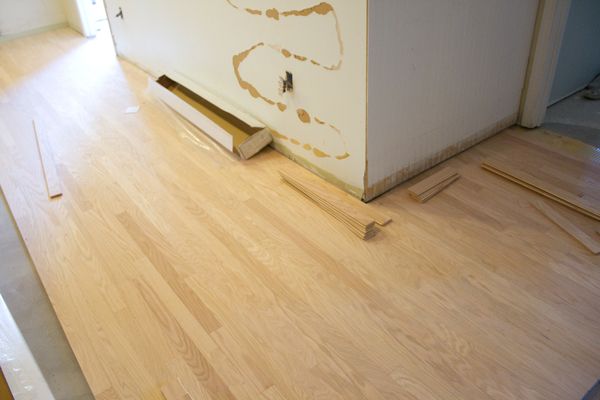
The next day, a couple more guys came over with Wade, and wouldn’t you know, they had that whole floor installed in under 3 hours!?
After that, things got a little wacky for a minute again. Not quite as bad as “Dust Lake”, but still, not the way we had planned.
Ya see, when we refinished the (60-year-old) floors in the rest of our house, Kev just sanded them back and then I applied four coats of clear Varathane.
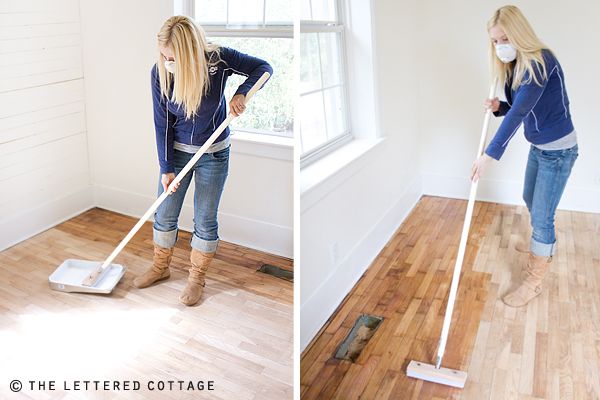
They ended up being the perfect warm pecan-tone we were hoping for…
Which is pretty cool because I didn’t even do a test patch first. (Whew!)
Well, things didn’t go so smoothly with the Varathane on the new hardwood flooring.
I was so anxious to get it sealed (before Max had a chance to do his business on it!), that we just decided to skip sanding them (which is what the folks at Carol’s Carpet told us to do), and I went straight to Varathaning right after Wade and the flooring guys left.
Bad idea.
The new floors were absolutely colorless before I sealed them, and they stayed absolutely colorless after I sealed them. Boo. Not the warm pecan color we were hoping for. *sigh*
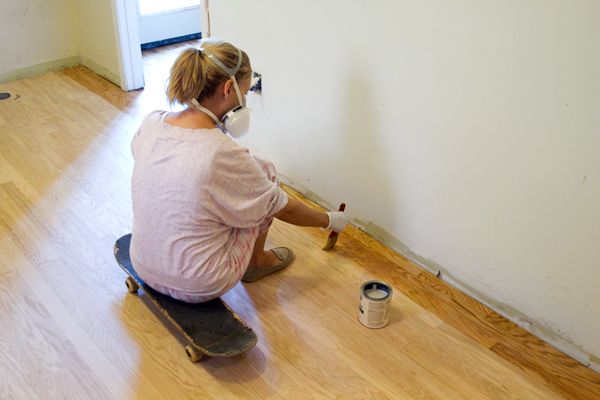
So, Kev ended up sanding the Varathane off with a palm sander, and in the end, the floor was waaaay smoother because of it, so that turned out to be a blessing in disguise. (Shoulda listened to those folks at Carol’s!)
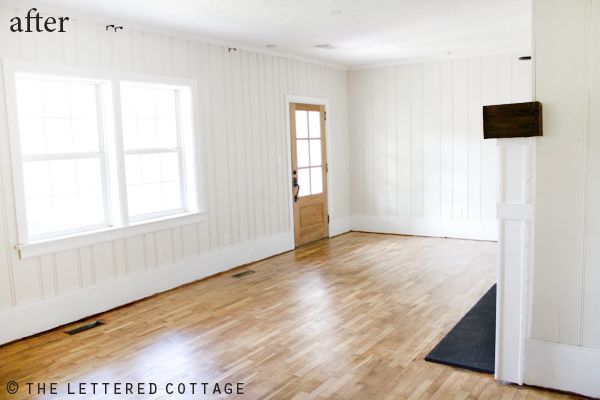
After that, I tested some Min-Wax Golden Oak stain (Thank you, again, True Value!) on a scrap piece of flooring, and I was super happy to discover that it almost perfectly matched the color of the old flooring in the rest of the house. It wasn’t a ton of fun to brush it all on and wipe it all off every 3 minutes, but it only took about two and a half hours to stain the whole floor, so it wasn’t too bad. (My neck and back were pretty mad at me the next day though!)
We spent all day yesterday priming and painting the walls and baseboards, and we look very forward to taking a turkey break today!
Happy Thanksgiving!

This post is a part of our True Value DIY Blog Squad series!

PS- You can find more info True Value (and the entire DIY blog squad!) on Facebook and Twitter!
Disclaimer: We were selected by True Value to work on the DIY Blog Squad and have been compensated for our time commitment to True Value-related blog posts. We’ve also been given a gift card to purchase the materials needed for our True Value-related projects, however, our opinions are entirely our own and we have not been paid to publish positive reviews. Boom!

<3 the use of the skateboard!
Looks awesome. You can do a gratitude happy-dance on your new kitchen floor this Thanksgiving. 🙂
Thanksgiving blessings to you. May you be as blessed as you are inspiring to others! {which is a whole lot!}
Wowie, wowie, WOW! What an ordeal! Well worth it in the end, but what a nightmare during all of that progress. Progress is never pretty, right? But all of that mess means you’re getting somewhere! 🙂
Wow – what a lot of work! It looks fantastic – enjoy your new floors!
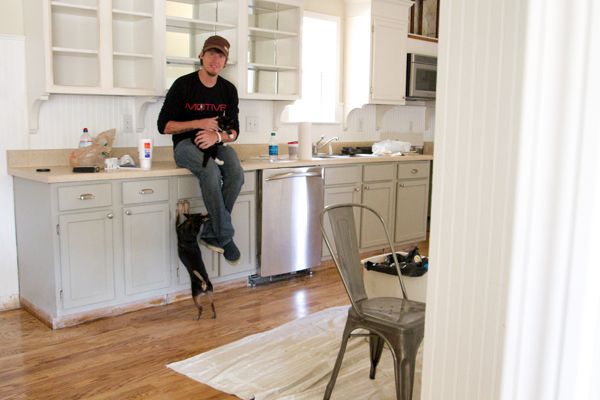
BTW – what paint color is your lower cabinet? LOVE that grey!
I love the skateboard idea…women are so ingenious aren’t we?
Well done, your kitchen floor is beautiful now. Just in time for turkey!
I’ve been renting for a long time now so I don’t get a free hand to do what I want with my home like you do, I’ve been following your blog and your house revamp enviously for a while now.
Happy thanksgiving wishes coming at you from the UK.
Claire from http:handmadebyclairebear.com
,
That was a huge job, but it looks really, really good. Hope you have a great Thanksgiving and take time to replenish. At least you know you can eat lots – you’ve already worked it off 😉
the floors look beautiful. You guys did a great job. love the skateboard idea. smart smart smart.
It looks wonderful! You are two very hardworking kids! You should be very proud of yourselves. Now take a break! Happy Thanksgiving!
Wow!..Using the skateboard to “sit and roll” is a fantastic idea..I will have to borrow my son’s skateboard!! You two are the master D.I.Y.er’s..You are such an inspiration.
beautiful : )
Happy Thanksgiving Kevin & Layla
! Gobble, Gobble!
xoxo
Happy Thanksgiving Layla and Kevin!
What a huge amount of work, but does it ever look amazing! My hubby and I went through a massive kitchen reno 3 years ago. We did a lot of the (messy) work ourselves, but were so happy with the final product. It was the only way we could afford to get all that we wanted, and we had the added bonus of knowing we did a lot of it ourselves =)
Layla,
How did you apply the Varathane? Did you just paint it on with a paintbrush? And did you leave it all on, or did you have to sand or wipe down or anything in between?
We did this HUGE remodel two years ago, but after I paid the hardwood guy all his money (after only one coat of Varathane) he never came back 🙁 So now we are trying to figure out how to fix the stain in spots where it has already come up (dog, kids, life), and somehow add three coats of Varathane.
What a mess!!! I am so glad yours is done. Such a relief.
Happy Thanksgiving!
Christine
Yellow Dog Design
Christine, I feel your pain about the wood floor refinish. After our kitchen reno, I felt like writing a song called “The Floor Guy Never Came Back”. What is it about those guys anyway? But I will say that everything worked out for the best in the end. So hang in there, girl.
Pam,
It feels good to know others feel my pain. We went through so much crap with our contractors I feel like I could write a whole musical. It makes me sad though to think I can’t trust people…..so I just choose to keep on trusting them, even if one takes advantage of me once in a while.
I’m glad your remodel worked out. I’m sure we’ll get things figured out too.
Thanks for your comment!
Christine
Yellow Dog Design
Just buff over it with a rented buffer and put the finish on with a brush you get at home depot. It isn’t hard. 🙂
Thanks Annie!
PHEW! I’m tired just reading all that so can only imagine how exhausted you guys are! ;). Looks great though – wonderful job! And Happy Thanksgiving (from Canada). Enjoy!
My neck and back were hurting at the mention of Kevin doing the palm sander, and then you went and talked about brushing on all the stain! Man at the work! It turned out absolutely beautiful though as everyone else has commented. Y’all deserve more than a turkey break…you need a full fledged steak dinner!
Happy Thanksgiving. I count you both as folks that I am thankful for.
Kelly
The floors look awesome! What a huge project, but it looks great! You guys are such an inspiration and I love seeing your projects. Happy Thanksgiving!
Chrissy
(p.s. I have used a skateboard like that before too! lol)
oh can’t wait to see it finished! 🙂
Happy Thanksgiving! And wow. I mean yikes that was no small job. I would have been in full blown panic mode after the tile came out with all the stuck thin-set. I’m glad staining the floors worked out for you!! It looks beautiful and will be well -worth the craziness I’m sure!! Enjoy your day off. 🙂
Looks gorgeous!! Want to come do mine?? LOL
You always make all your projects look so fun! Love the way you do everything together! Happy Thanksgiving!
Looking forward to your next post of the finished project! Can’t wait! Happy Thanksgiving!
First of all………………Happy Thanksgiving!!!!
Secondly, you kids are INSANE!!!!!! I can’t believe the mess involved. Where do you put all your “stuff” when you tackle a job that big????
Your kitchen was looking so pretty……..now you have to paint those rooms again???? Ah………………how many layers of paint are there on those walls??? LOL
Cannot wait to see the rooms when they are finished. You two just take my breath away!!!!!!
Amazing. Amazing. Amazing. Every little thing you do. Can you hear my applause?
BTW, who won the rugs???? Is the winners name hidden from view?
>^:^<
wow! what a back breaking job. Such an accomplishment! Ya’ll both deserve to get a massage. Enjoy your turkey day!
what an ordeal but look what you got in the end! i hate the tile in my kitchen and would love to have hardwoods laid to match the adjoining den and dining room but that probably ain’t gonna happen anytime soon.
hope you and kevin had a wonderful thanksgiving (and got a little neck massage for your aching muscles)!
judy
Praise the Lord for “a couple more guys”!
Looks great ya’ll!
Whoa. Did you get a special medal for all that work? I hope so. Or at least a Toblerone.
It looks wicked awesome. beautiful.
The floors look great. I would have been nervous too bringing a water hose into the house. Looks like it paid off though.
I also love the use of “Boom” at the end. The Wal-Mart commercial cracks me up every-time.
Good Job as usual. Will you please share the name and make of the flooring? I am looking to match up existing flooring and can’t find unfinished wood floor.
I just love how your floors turned out…And don’t worry I always get ahead of myself as well and make more work for all that is involved 😉
Happy Thanksgiving…
http://www.mydailyphotojourney.blogspot.com/
http://www.facebook.com/MyCrazyBeautifulLife.13
http://www.pinterest.com/denyse13/
i totally would have cried at the dusty pond!
the final result turned out really well. congrats on perseverance…it certainly seems to have paid of!
hope your thanksgiving was tremendous. i’m incredibly thankful i found your blog…
Y’all are DIY-ers on steroids. W.O.W!
You guys did a great job and are so patient! That is one thing that keeps me from doing a big reno at the house, because I can not take the mess… I get really difficult to get along with during those times.
I have done the skateboard thing, too! So much easier! You amaze me! Looks beau-ti-ful! 🙂
Happy Thanksgiving (late 😀 )! I love the new floor and all the hard work was so worth it. A question though, your kitchen has concrete floors, did they lay plywood down before the wood floors? I’ve heard that has to be done for some reason, but the pictures didn’t show that.
I giggled out loud when I got to the photo of you on the skateboard…genius! The kitchen looks awesome! What an adventure getting there, eh?! Well worth it!
Wow! Looks great! I can only imagine how much work that was. Patience, perseverance and determination … that’s what you got! Go Palmers!
My wife found your website and jokingly texted me instructions to locate a skateboard and a True Value Hardware Store before we begin the floor restoration in our 1920’s California Bungalow. (My neck and shoulders already hurt in anticipation of the sanding and staining required.)
Thankfully your blog proves inspirational as we plan for our first DIY project in our new home.
Warmest regards from your two newest fans and cyber cottage neighbors.
Christopher and Karin
My husband and I are contemplating demoing out our tile/carpet and installing new wood, but we didn’t even think about what to do with the thin set. Thanks for the pointers! Your floors look beautiful, you all did a great job!
You have convinced me to never buy a house with tiles I don’t like on the floor!
I am also going to get a skateboard, great idea for painting around lower edges of walls & skirting boards{ not sure what you call them?}
Hmmmmm….makes me think twice about wanting to rip up the ugly tile in my kitchen, Layla! lol! Although your floors do look absolutely beautiful! 🙂 Loved seeing the transformation!
xoxo laurie
I love your descriptions- flat metal thingy, etc. Makes me feel like at ease that I don’t know every tool for every job my husband has ever tackled! It will look wonderful!!
The kitchen floor looks amazing – nice job!
But your poor backs – palm sanding and then hand brushing on the stain?!?! Oh man, my own back is sending out sympathetic creaks of protest!
That messy mud lake getting brushed out of your side door would be enough to make me break down in tears. There are so many bits to a DIY home reno that no one expects. I bet you are glad that part is over.
My fav photo is Max on the old thin-set. He is so adorable.
It looks beautiful! Thank you for sharing the not-so-perfect parts of your home improvement adventures. 🙂
Beautiful! I love the slight variation between boards. So warm.
Wow, it looks great! Bummer about the staining problem. If it’s any consolation, this post will probably save others from making the same mistake! 🙂
Love the new floor! You and Kevin take on the most amazing projects!
Wow, that was a ton of work! Way to stick with it till the end! I like your skateboard staining accessory.
Amazing.. looking at your starting point to the, oh so messy middle point, to the bring it on home point.. What a wonderful transformation, wonderful job, I can only imagine how happy you are that it’s over. 🙂