A couple of weeks ago, I blogged about the white shutters we got from our Facebook friend, Toney…
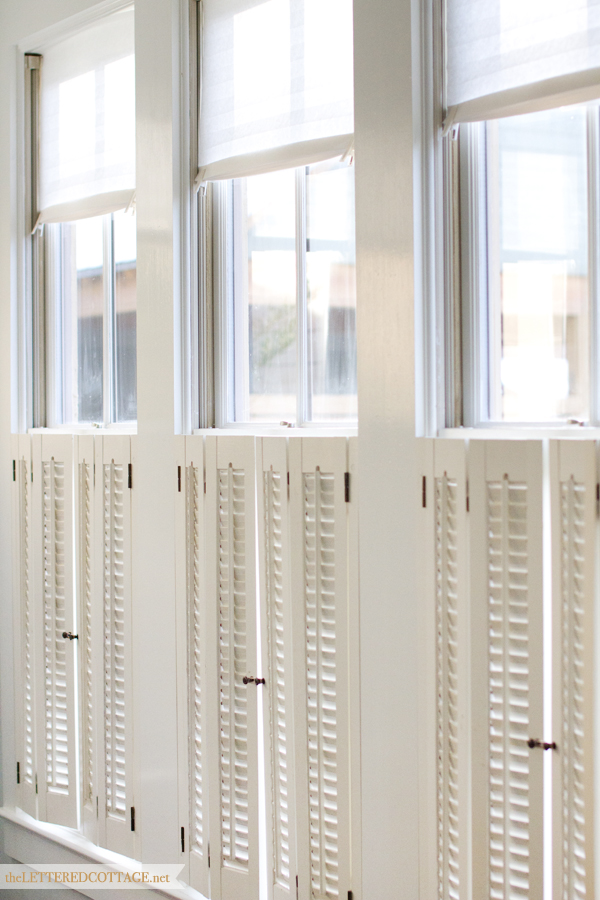
In that post, I mentioned that we were still trying to figure out what to replace the temporary paper shades on the upper half of our windows with. They’re okay for now, but they’re a pain in the booty to move up and down, so we just keep them up 24/7- which isn’t ideal.
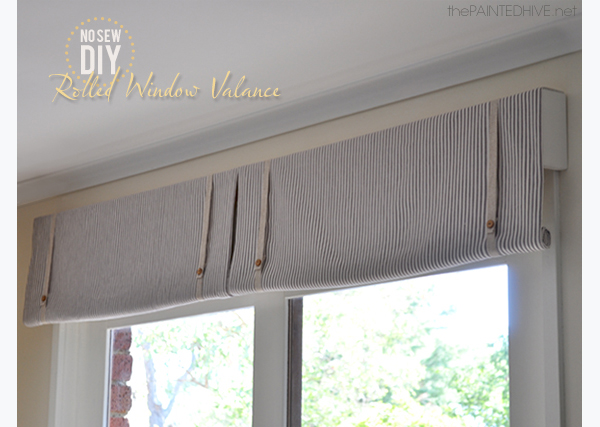
Since that post, I’ve searched and searched for solutions, but I never could find anything that looked/costed/worked just right. Up until a few days ago, that is. I opened an email from my friend, Kristine, and BAM! Super cute/affordable/functional window treatment inspiration!
Basically, she used all this stuff…
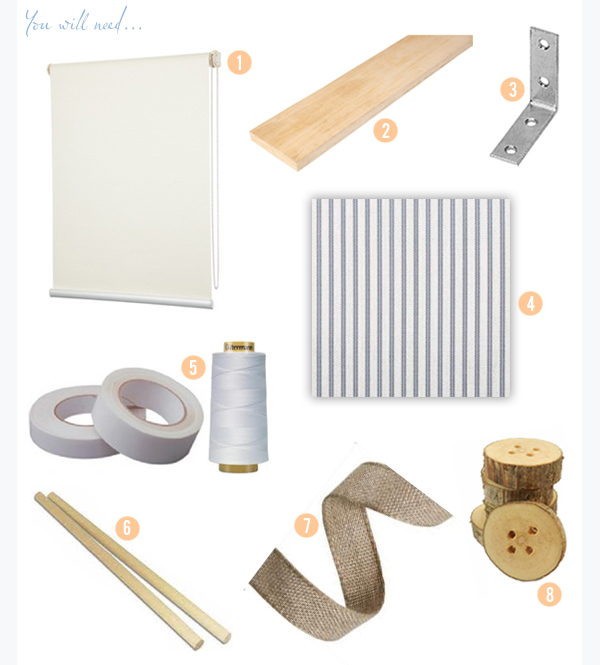
…to cover up a plain, black-out roller shade…
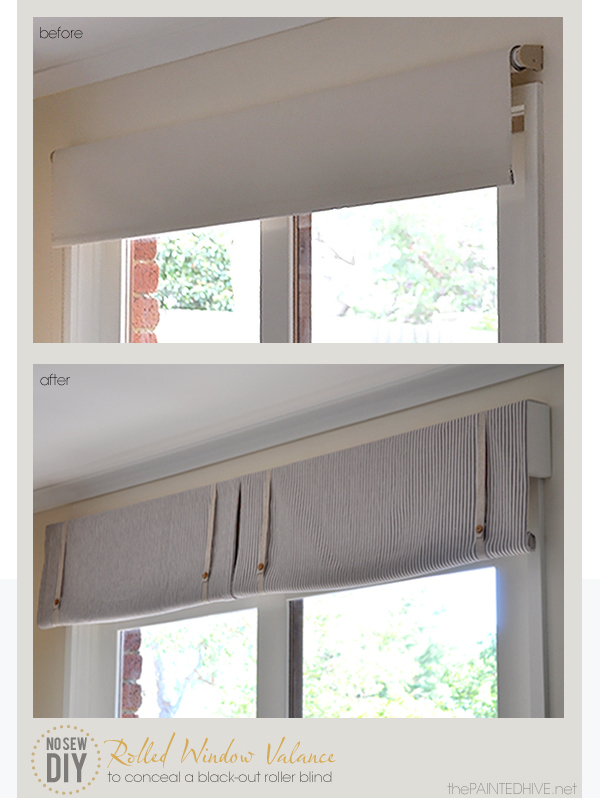
…so that it’s hidden most of the time, but there for privacy whenever she wants to pull it down:
Pretty neat, huh? I’m still not exactly sure when or how we’ll go about putting our window treatments up- but man am I inspired by Kristine’s project! (Thanks again for sending it so that I could share it here, Kristine!)

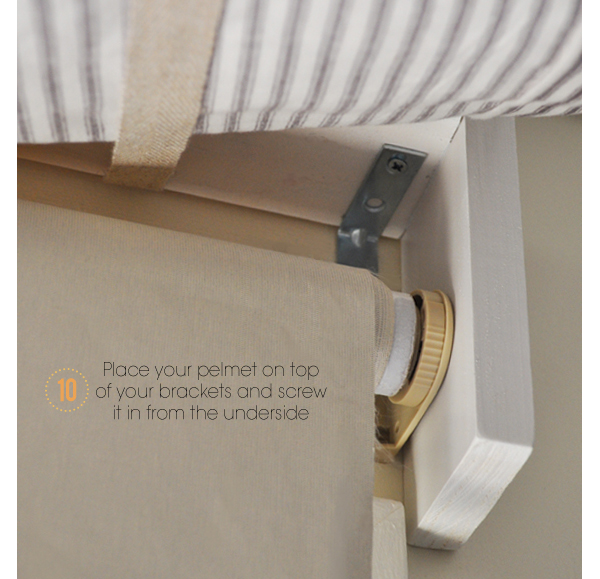
PS- Click on the banner below to read Kristine’s full DIY Shades tutorial post!


Love these. What a great option. I am looking for window treatment idea for our guest room with an arched window….This might just be the best option for me too. http://thedomesticlady.com/2012/11/28/home-improvement-guest-bedroom-progress/
THAT is super cute! Love it!
Cannot wait to see yours completed. I know it’s going to look great!
So did she add the material to the blackout shade or is it just under the material? Really cute.
Hey Denise!
Check out that last photo- it sort of shows how the fabric just hangs in front of the roller blind. Kristine has more detailed pics and info over at her blog. Such a fun project! 🙂
What a neat idea! I really like the fabric 🙂
something else you might consider, Emmie roll-up blinds from ikea.
i have them in my bathrm and kitchen. they are hung with a tension rod. they are linen. you can hang them however low or high you want by by using the buttons that are on the blinds.
love them.
Hi Stacia!
I love those too. Are they easy to roll up and down a couple of times a day? We have six windows, so whatever we end up going with has to be super up-and-down friendly! 😀
not as easy as the type that have a pull cord. but it didn’t stop me from buying them. i have 4 windows in my bathroom and every night i roll them down and every morning i roll them up.
i also have them in my kitchen but i keep those up all the time.
it takes time each day but i still love the clean look of them.
Ohhh, gotcha. 🙂 Our windows are like 8 feet tall, so I’m not sure that’ll work for us- but man I love those shades…so pretty! 😀
Ooooh, I’m loving that idea! Looks super cute and I like the no-sew! Can’t wait to see how your’s comes out.
Hi Layla
Thanks soooo much for featuring my project! I’m totally thrilled and flattered 🙂
Kristine
Well look at that! What a great upgrade for the space! Those shutters are right by my alley as well. This space is really coming together. 🙂
genius.
In your original post about your shutters, I commented that I also purchased shutters for my older home – but realized after getting them home – that they’re about an inch or less too narrow for my window frame and you mentioned yours were also, so I was wondering how you installed them. Any tips would be appreciated!
Oh, we just stuck ’em up there and since there’s a piece of wood running down the middle of the glass, we’ve just left ’em! 😀 We may do something later to “bridge” the gap, but we haven’t thought about it yet. #ProcrastinationStation 😉
Perfect! What great idea! Those will work wonderfully! How nice that a blog world friend shared with you and you shared with us!
Super cute! Love the wood buttons. Those are too adorable and the fabric? Yes please!
What an excellent idea and it really doesn’t seem that difficult! Hmmm, you’ve got me thinkin’ ! Thanks for the idea 🙂
LOVE the shutters AND the valance! Great ideas!!
Leah: )
if you decide on black out shades in any portion of the house, you’ll appreciate it the most in a napping child’s room. you can’t even imagine the difference a little dark makes for a afternoon nap.
LOVE this. I have seen so many tutorials on decoritve shades but I was looking for one that I can actually use and that looks pretty! 🙂 Super cute idea. And I love those little log buttons or whatever they are.
I saw that post too and it stayed in my mind as well as I have a plain, roller shade in my kitchen. Maybe I’ll wait and see what you do first!!!
That is super handy!
Love this idea! I am off to check out the link!
Love this idea!
I love them! Thanks so much for sharing the how-to with us! Love the shutters too!
What a great idea! Perfect for the grandbebe’s playroom/sleepover-at-Nonna’s room. Want the light-bright-open windows while they play, and the black-out shades to keep them in bed in the mornings until at least 6! 🙂
Why don’t you grab some ofthose white paper cordless blinds from target instead of a roller? They don’t droop like rollers do. I’ve had them in my kitchen behind short fabric pelmets like thus forthree years and they’re still going strong, for $20 each!
http://www.target.com/p/econofit-cordless-cellular-shades/-/A-12331989