Remember that twine-covered chandelier pole we ordered through our (interior designer) neighbor, Cindy, last year? The one we added to the chandelier in our sunroom?
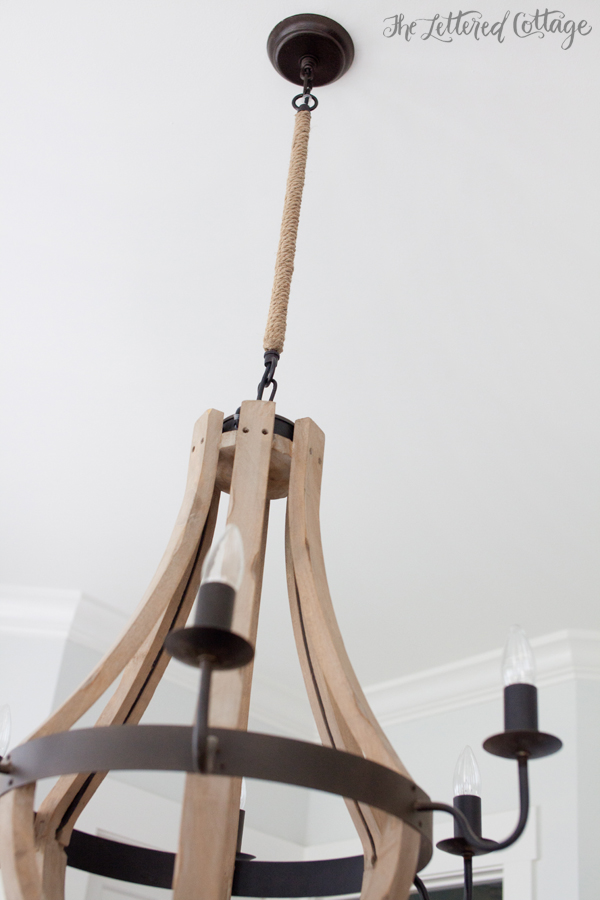
Well, that one normally costs $49.50 through Aidan Gray, and even though we were able to order ours for $20 from Cindy, we were determined to come up with an even less expensive DIY solution to cover up the chain in our dining room.
We started with some of this ($4) Cordmate tubing from Home Depot:
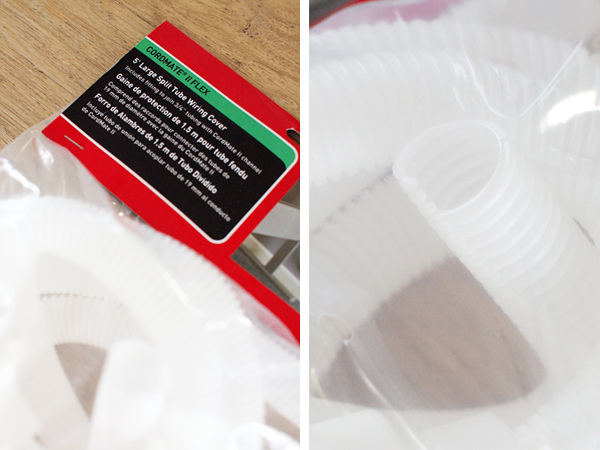
It has a slit down one side of it, and it fit just perfectly around the existing chain:

Once it was on, Kevin started hot-gluing twine to the outside of it.
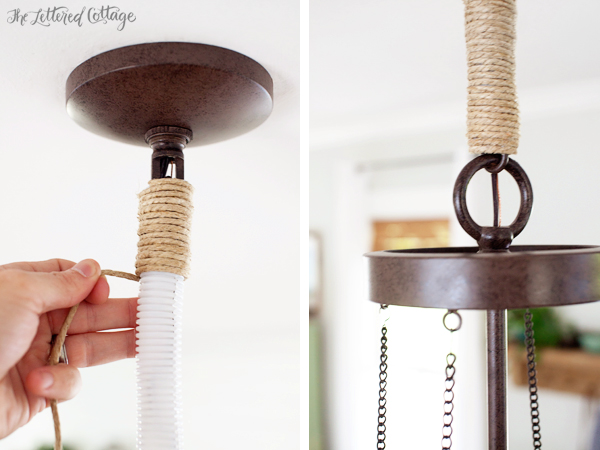
I stood on the floor and fed it up to him (on the ladder), tossing it around the chandelier each time he needed it to wrap around it. We did it that way (vs. cutting a long length of it) because we weren’t sure how much it was going to take, and we didn’t want to run out and have to start a new length. #I’mAllergicToSeams 😉
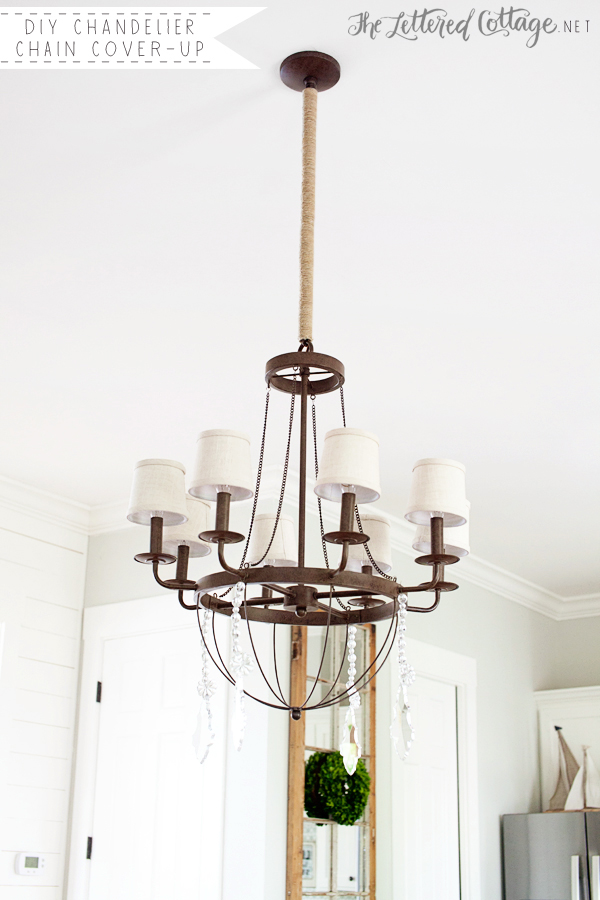
It took about an hour, and Kevin’s arms and my neck were pretty pooped by the time we were done, but man what a fun difference it makes…especially for less than five bucks! 😀


GENIUS! So been looking to do something updated with our wrought iron chandeliers – this is it! Thank you.
Layla,
LOVE this $5 idea!!! Gotta try this one.
Blessings,
Linda
That was so clever! I would have never thought of doing that – covering the cord. I always let the cord show. Looks great.
Your post lit a light bulb up in my brain. I can’t do my light fixture chain because it’s swagged…….but…..I can wrap the poles on my ceiling fans!!!!!! Thanks for the tip!
That is so cool and it looks fantastic! I might just have to steal your idea.
I agree, I might have to steal it too 🙂
Wowser! It looks awesome! Now where fid you gind the horgeous chandelier? Love it!
I went back to your link and found the chandelier. Thanks any way. Your light is lovely
I would have never thought to put the plastic on first. Very smart! Pinning this for later! Love the look!!
How would you get the wrapped tube around the chain?
Hi Sylvia!
The tube has a slit all the way down one side of it. 😉
I understood that. My reply was to Denise who wouldn’t have put the tube on first. If she wrapped the tube with the cord first, she would have been able to get the tube around the chain.
Don’t know if anyone else is having this problem but your posts are not showing up unless I get in through my e-mail. Love the chandelier cord cover, brilliant!
Karen – I’m having that problem, too. The last few posts won’t show up on the website but I can get to them via the link from the email.
Very clever! I think, however, you were standing on the floor not the ground :-). I know… one of my pet peeves.
Fair enough. Off to edit. 🙂
This is the best idea I have seen in a hundred years! I was recently given an outdated “chandelier” that I have been struggling with finding a way to use it and love it at the same time. I’m going to get rid of a big ornate section that is just too hideous to bare but the rest of it has some possibilities. One thing it will have though is a fair amount of exposed chain – and now I know exactly what to do with it!!! Thank you sooo much! You have given my poor “headed to the dumpster” light another chance at life!
GORGEOUS!!!!!! “I am allergic to seams”
Clever girl! What a great tip! 🙂
This is such a great idea! Well done!
Love it Layla!
Brilliant!!!
Kevin rocks! This is a great idea. Thanks for sharing.
That is a clever idea!
That is awesome! Thank you so much for sharing!!
What a fantastic idea. It looks great!
Awesome makeover!
Brilliant! Looks so finished now. They also sell these at Ballard designs.
Might have to try and diy this myself for our kitchen chandelier.
Betsy
Love, love, love it! A really practical solution that makes such a big impact.
Lovely! Genius!
I covered my little chandelier lamp shades with jute. Just spun them around wrapping the jute and babbing hot glue. Look great in my coastal cottage themed home. My have steal your idea for the chain! Thanks for sharing!
BRILLIANT! and gorgeous.
#jobwelldone
If one were planning ahead, any reason you couldn’t wrap it before you hung it?
It look fabulous! Great idea!
Perfect DIY! Cheap, easy, and makes a statement. Thanks for sharing!!
Love it!
Your original chandelier was from shades of light & made with wood, but this one is not. Is this the same chandelier? If not, where did you purchase this one?
Thanks!
Hi J!
The first chandelier is in the sunroom, the second is in our dining room. (You can see both of them in the same shot in this post I published on Monday: https://theletteredcottage.net/dining-room-update-diy-twine-chandelier-chain-cover/) The first is from Shade of Light, the second is from Ballard Designs. 🙂
Where did you buy the chandelier from?
Hi Catherine!
Check out the link in the comment above…it’ll take you straight there! 🙂
so so smart! I love that idea 🙂 Would also love to know where you found this light fixture? its beautiful!
Ops…sorry. Got it now….Seems others were posting the same question at the same time. thanks!
Love this! Even if the natural color of the twine wouldn’t work in a space, you could mist it with a little spray paint and it would look better than the chain! Thanks for the idea, Layla!!
Oh my gosh!! Great idea, great look, and I can’t wait to try this! Thanks so much!
That’s awesome!
Very creative! I used a half hitch done over and over (from my old macrame days) to cover the chain and cord for the shell chandelier my daughter and I made five years ago. You can see it at thepleatedpoppy.com search shell chandelier.
At first I was thinking “no,no,” but now I’m saying “YES!!!” What a fabulous DIY.
BRILLIANT! I would never have guessed!! I’m running out to buy some!!
Thanks for the idea!!
Awesome! I knew this was coming so I looked up at my chandelier last night, while cleaning up the kitchen, trying to think what/how you would do that. (How did I know what you were going to do?) I have a short chain and t.p. roll came to mind, then covering with twine/rope. Your idea is a bit classier but the t.p./p.t. roll with a slit would make it even cheaper!
What a clever and perfect solution! And cheap is good too : )
You are SO clever! It looks great.
Love it! I’m going to steal that idea. How clever. And what a guy to do that for you!
Ya’ll are so clever! I need some of your creativity at my house.
It looks fabulous and is a very clever idea. But I have to say I love chains 🙂
Brilliant idea Layla! I wrapped my chain with a long skinny scarf in colors that match my dining room. Tied the scarf at the middle to the top of the chain and wove both ends around the chain, kind of like braiding it. Then just tied it off at the bottom and let the fringed ends hang down.
Such a clever idea! I would never have thought of using that plastic tubing! Genius!
Brilliant!
Note to self – I need a few boxwood wreaths this year…: )
Leah
Thank you so much for this! I have one in my dining room that needs that very same touch and I didn’t even think about using tube wiring cover. Look at you Smarty Pants!
Soooo clever!!
SMART Move!