Do you know Sarah from Cozy. Cottage. Cute?

She and I have been talking about her fireplace plans, and I thought I’d share an idea I came up with in Photoshop yesterday. First though, here’s what she’s workin’ with:
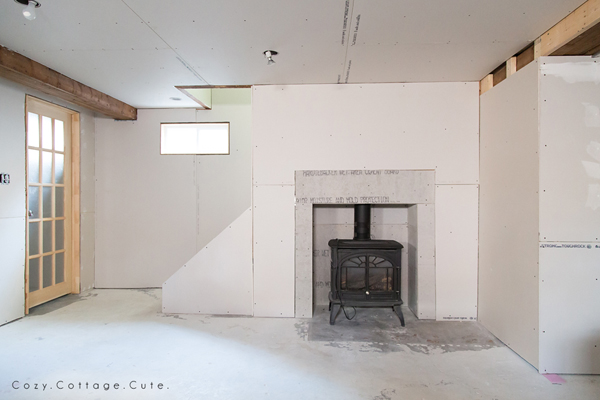
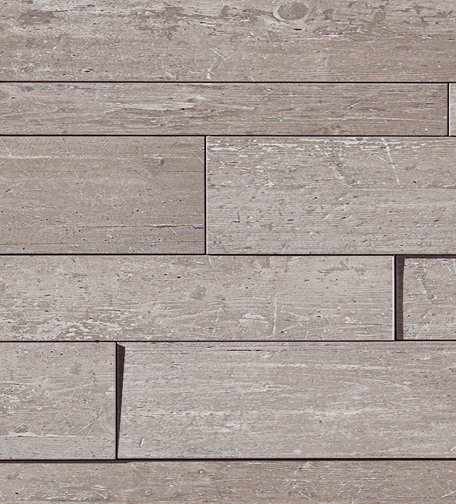
It’s located in their basement, and this is a screenshot of the laminate flooring they’ve purchased for the space:

(It’s made by Reclaime and it’s their Mocha Oak color.)
Sarah and her hubby have already picked out/installed some of the tile that’s going to go in and around the fireplace, too. This will go around the inside of the firebox:
(Collection- Wood 2, Colour- Dust, Size- 12″ x 24″ mosaic sheets)
This will go on the floor underneath the stove:

(Collection – Wood 2, Colour – Dust, Size- 24″ x 24″ )
And this will go around the outside edge of the fireplace:

(Collection – ECollection, Colour – Ibirapuera Patina, Size- 8″ x 48″)
They got all the tile at Ceragres, and you can kind of see how they look together in this next photo:

Pretty, huh? 😀
Sarah also sent me a photo of how they’re planning to paint the walls down there:
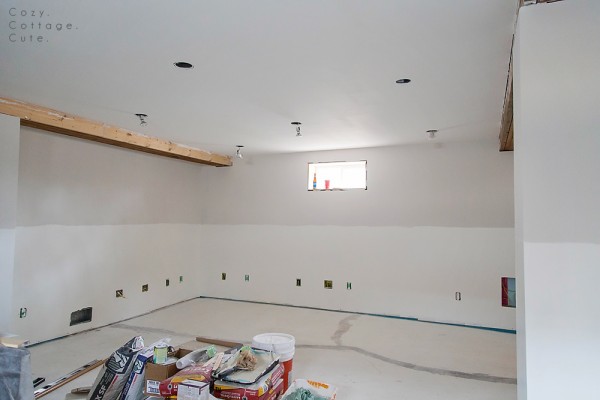
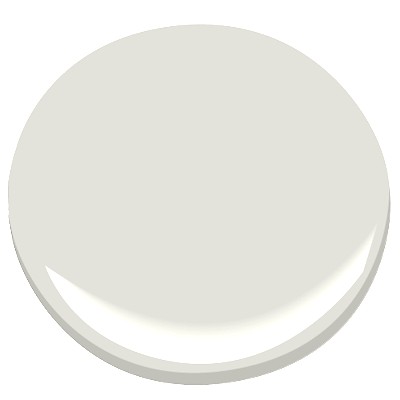
She said they are in the process of painting the upper half Silver Satin…
…and the lower half Simply White. She said they want to do some kind of board & batten style wainscoting on the lower half, too.
Now, she’s probably not going to want to read this first suggestion (feel free to take it or leave it, Sarah! 🙂 ), but I think I would paint the walls one color, and skip the wainscoting. Reason being- I think that when you’re working with a shorter space, height-wise (like in this basement), it’s better to not break up the vertical plane with elements that make your eye stop and start…and notice the height of the room more. I think painting the room one solid color, or using vertically-oriented paneling all the way from the floor to the ceiling, will create a “taller feel”, visually. She could even do a mix of both- some painted walls, and some paneled walls. Like this: (move your cursor on and off of the photo below to see it presto change-o!)

Here’s a still image in case you couldn’t view the interactive one above:
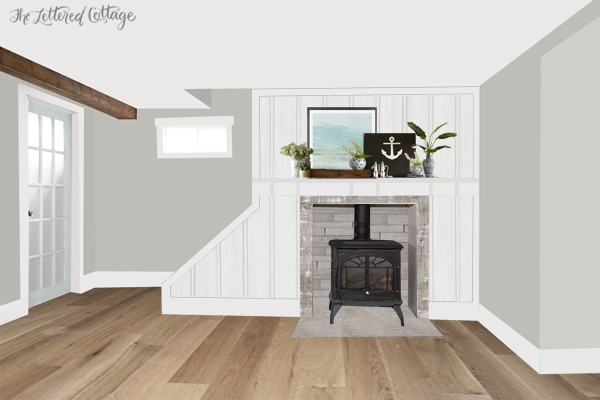
My inspiration came from this Pottery Barn fireplace photo that I’ve always loved:
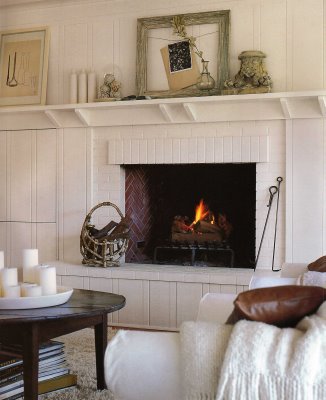
Sarah’s husband (Alex) is very handy, and I’m thinking a wall/mantel like that would be fairly easy for him to re-create if they decide they like the look. I’m sure she’ll keep us updated on their progress on her blog though, so it’ll be fun to see how everything comes together!

PS- Want to learn how to create your own inspiration photos using Photoshop or Photoshop Elements? Check out Room Makeover training class over at ShootFlyShoot.com for more info!


I’ve always been in awe of your mad photoshop skills! 😉 I’ll have to check that out!
I agree wholeheartedly on not adding the wainscoting in a height challenged room. Love your presto!
I agree on the single colour in the basement and some type of verticlal embelishment will trick the eye and your psyche into thinking it is a bigger space .
Also the fact that there are not a lot of big windows – the 2 tone wall theme along with the proposed batten finish will be too heavy. I also noticed there are a lot of outlets in the space – if they so not spaced properly within the batten it tends to look a little odd and the lack of symmetry , would personally drive me crazy .
Overall a great space , looking forward to seeing the finished room.
gg
Well, I can hear your voices on ShootFlyShoot, but I can’t see anything………… is that supposed to be like that for today?
Hi Jeanna!
No, you should be able to see the video, too. I can see it on my computer, so I’m not sure why it wouldn’t be showing up over there. (?) I’ll check with our web developer and see if he knows why that might be happening.
Update: Okay, apparently it could be because of some kind of firewall you have on your computer. You will have to shut that off to view videos on Vimeo. Hope that helps! 🙂
I think she may be talking about how at first you guys talk while the screen is just white with the main label. I thought the same thing – that it was a technical issue and that I should be seeing you instead. But, just let it play and eventually you will see images on the screen. It works! 🙂
I just love your presto chango photography and your ideas! Will be looking forward to the finished project pictures.
Layla! These are my absolute favorite kind of posts and I wish you would do lots and lots more@
Blessings,
Sindy
what version of Photoshop do you use? Thanks! Love the Room Makeover training class today! Thanks!
I wouldn’t have thought about the wainscotting breaking up the visual, but it makes sense, and I love your suggestion that still allows for some paneled walls, but visually will make the place seem more spacious.
Beautiful inspiration photo and your online tool looks helpful for anyone remodeling, redecorating or just dreaming! 🙂
OHMYGOSH it is soooooooooooo pretty! I love, love, love it. If the basement turns out anything like your photo then I will be in basement heaven. 🙂
You have totally and completely thrown me for a loop though because I was 99% sure that I was going to go with the half-wall wainscoting.
You’ve got my wheels turning – which is a good thing because I was feeling stuck in one direction. Thank you so much, Layla! You are the best.
P.S. Did Alex email you in secret because he was really complaining about having to do all of those board and battens, LOL!
Yay! I know whatever y’all decide to do down there will look GORGEOUS, Sarah! Keep us posted! XO
I agree totally on the two colors for the wall. Unless your ceilings are 9-10 ft tall, one color is the way to go. I think if you used two colors, you would always be ducking your head, and you would feel closed in. Keep it simple. Love the fireplace treatment. Ann
I just completed your Room Makeover course! Great job! I have already been doing a lot of what you described, but I did definitely learn a few things like the sponge tool – hadn’t really used it. And, I just hadn’t been as meticulous with everything as you. But, I will be now! It was so fun to see exactly what techniques you use. Thank you for sharing and thank you for making the videos available today for free!!!
What do you use to create the mouse rollovers?
I am considering doing a sample project based on your course and then offering one for free to a lucky winner sometime soon!
Thanks again for sharing!!!
Hi Kristy!
Thank you for the kind comment about the class! It was fun putting it together with Kevin. 🙂
I installed a mouseover plug-in made for WordPress sites, and then used the code I blogged about here:
https://theletteredcottage.net/mouseover-how-to/
Hope that helps!
Thanks for generously sharing your training video. I like your style of partnering. Very easy to follow along. When I upgrade from my point and shoot camera I shall be wanting to get classes with shootFlyshoot! Bless you!
I had no idea that putting the photo shopped rooms together took so many steps. You two make it look so easy. I wish I’d known how to do this before I made some expensive decorating mistakes!
I appreciate your attention to detail, and as always, I love your style and the finished rooms. I enjoyed your relaxed style on the lessons and the rapport you two have. So generous of you to share these lessons too!
Can’t wait until your Sweetpea comes home to make your family complete. I’m praying that you will have your arms around him and be breathing in all his sweetness very soon.
SO generous of you to share this tutorial with us! thank you! i have PS experience but not quite in this way, so it was so helpful … my mom and dad are moving into a new space and this will be incredibly helpful to aid in choosing decor!! Thank you!!
Oh no! I missed out! Here in the Land of Oz we are on a different time zone and it says I have no permission to view! Waaaah! I should have woken up in the middle of the night to watch it. Oh well, at least Sarah’s fireplace redo looks great!
I love your idea!
Okay, you are so handy dandy with that cursor trick!
This will be the most gorgeous basement ever.
I completely agree about keeping the walls visually “tall.” But…..sorry….I think I’d put the board and batten on all the other walls, maybe in Silver Satin paint, and then keep the fireplace wall plain. It will already have so much going on just with the height and the mantel. And then paint that wall (the fireplace wall) an accent color.
Maybe your Gray Owl color for the fireplace wall?
Gosh I wish you’d help me too. My latest post has a design question – feel free to weigh in!
Thanks!
I love your version! We are looking at houses in Seattle now and I would love to see a house with something like that in it right about now. Already I am missing my home in southern California, but one must move on. If only our current home would sell already.
I worked a 16 hour day and came home and read this post and went to read the Room Makeover Tutorial and got all the way to the last one, just started it and “Poof” off it went at midnight. What I saw was wonderful and I’m glad I took notes on what I saw. Thank you! 😉
Thank you, Lorrie!
I’m glad you enjoyed the class, too! It was actually available until 9am this morning, so I’m not sure why it would’ve disappeared at midnight. ?
Thank you for the great tutorial yesterday, I really enjoyed it! I have been working in Photoshop for many years, and there are still some tools that I haven’t even tried to use! I learned some great tips and tricks from the lesson and I just wanted to say thanks! I will have to work on getting my flooring to look correct, it is so tricky…you make it look so easy! 🙂
I hope that Sarah isn’t irritated by your first suggestion, because I agree with it 100%. I would also paint the walls a single color. I love the suggestion that you gave – it’s so pretty! <3
Oh, no, you can read her comment above, Jessica! I think she’s having fun with it! 😀
Wow! So beautiful!