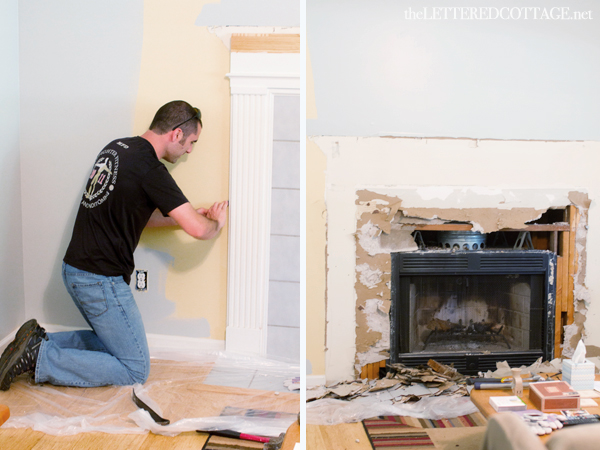
Kevin and I have both been under the weather this past week/weekend, but before the crud really knocked us out, we had a chance to do a little work on Keith the Fireman’s fireplace. First Kevin and Keith removed the old mantle and tile…

Scoring with a utility knife, and a couple of hammers did the trick, lickety split!
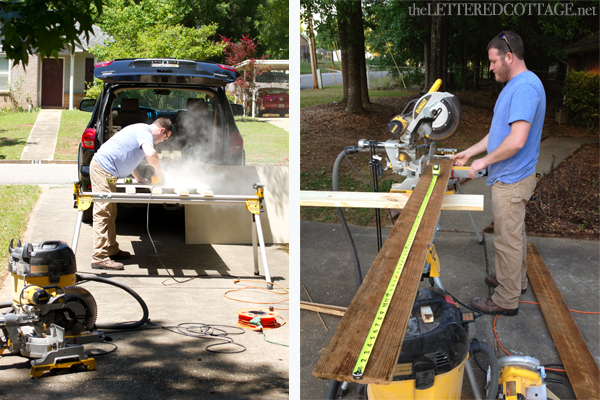
We had planned to go back over to Keith’s this past Thursday to build out the new fireplace, but Kevin had gotten really sick by then, so I met Matt (from Perfectly Imperfect) over there (while Keith was at the fire station) this past Saturday…
…and here’s what we came up with: (Caution: low-lighting, cell phone pics ahead!)
(Thanks again for your help, Matt! You rock!)

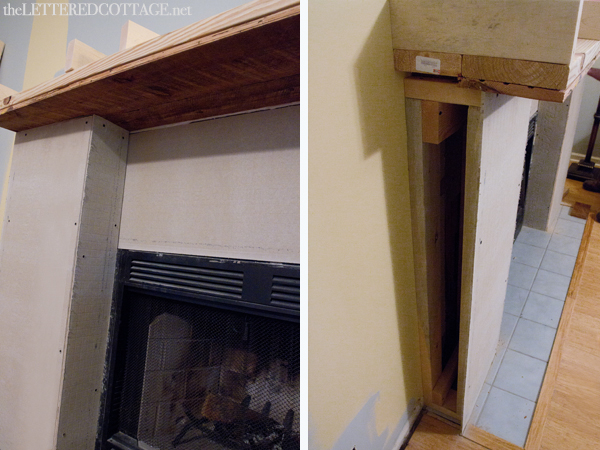
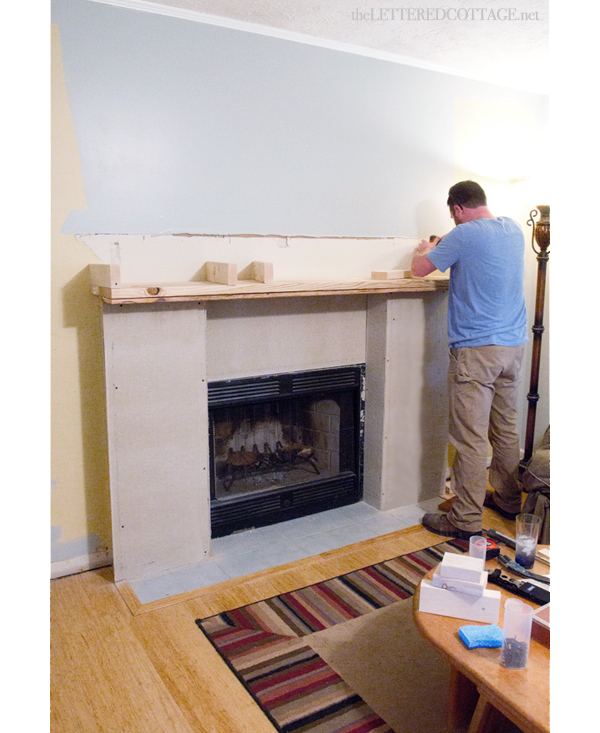
We were at Keith’s for 6 hours total, and we were really just kind of winging things as we went along. We ended up using 2×4’s to frame out the boxes on the left and right, and then we clad them (and the little piece of wall directly above the firebox) with cement board. According to the guys at the fire station, cement board should always be used around a working fireplace when you’re butting it right up against the fire box like we did. After that, we created another “box” out of 2×4’s to act as a mantle beam. We used a nail gun to attach the thin, barn wood planks to it, and voila!
I’m thinking about using a (gray-colored) concrete skim coat product (SkimStone) on top of the tile on the floor, but I haven’t had a chance to research it thoroughly yet. After that, we’ll attach the AirStone to the cement board, and then we’ll start working on the bookcases on either side of the fireplace.
But for now, I’m jumpin’ back in bed. I woke up sick and without a voice yesterday, so obviously my body is telling me to take a couple days off!


Love it! Feel better soon, both of you!
Looking great! Can’t wait to see more progress. Hope you’re feeling better. I woke up not feeling so great today. My and my little one are having a quiet day at home today.
LOL! I’m so excited! Thanks so much! I’m going to pick something for my grand daughters bedroom. Thanks again, Becky
Hola
Feel bettah! The fireplace is going to LOOK bettah! The horizontal gray planks rule my world today!
K A Y
Love it!! Wow – really stunning, I cannot stop looking at it! Hope you and Kevin get better soon. Nothing like being sick together 🙂
Love the mantle! Hope you both are felling better soon!
Looks awesome! I love the antler idea…where would
I be able to get mounted antlers like that? Any idea?
Thanksso much!
Thanks, Ashley! We’re not actually using antlers at Keith’s place, but I have found some awesome ones on ebay! 😀
Nice job sweetness. So sorry you guys have been sick. Feel better soon;
I’m very curious about the thin barn wood “skins” – is that cheaper than buying an actual barn beam? You can’t even tell it’s not the real thing! I love it!
Looks amazing!!! Great job!!
Kevin solo at church was awesome yesterday. I was wondering if you do local work? I homeschool and want to convert and office space to a cool fun homeschool room. Send me an email if you do. I’m the greeter who said hi to you at the door a couple of Sundays ago ..( found the site thru pioneer woman)
Did you fix the dry wall first before building it out?
Yep! We used more cement board back there too! 🙂
Sending you some homemade chicken soup!!!
(Blog-speak for “get well soon” !: )
Love the direction this is headed! Very excited to see the finished product!
Praying for a speedy recovery for you! The work done so far looks great and you have me waiting anxiously for the next step : )
Hope you’re both feeling better soon! I was sick with a nasty bug last month and am STILL not 100% yet! Hope you just have “garden variety” !!
Looks fabulous! I did a double take when I saw Matt on your instagram feed this weekend 🙂 He and Shaunna are so sweet, I totally not surprised that they came to the rescue!
Oh gosh, hope you’re both feeling like your old selves soon. That is going to be such a wonderful update, thank you for that wonderful inspiration.
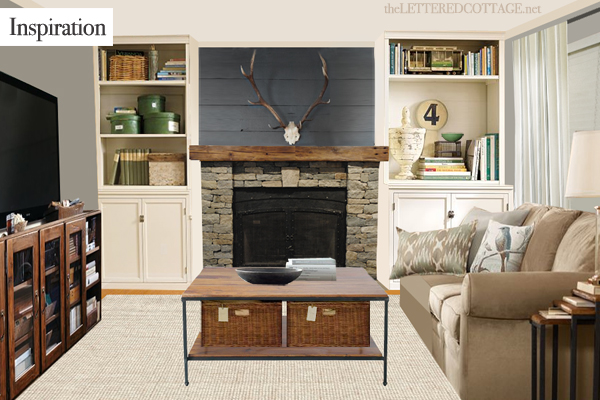
I LOVE your inspiration photo! I can’t wait to see part 2. 🙂 Have you thought about having the face of the mantel carved? That would look great!
Hope you are feeling better!
Can’t wait to see how the AirStone product turns out and your thoughts on it Layla… I am thinking about adding it to some interior walls… went to Lowe’s and unsure of which product/brand I want to use now.
This project has partially inspired my own fireplace transformation! We will also be using the AirStone product but are having trouble finding a product to paint our cement hearth. Have you done any more research on the product you found? Lowe’s seemed to have no idea how to do this….
Love your blog!
Can’t wait to see the final reveal!
Hi! I’ve been checking back every day to see if you’ve posted the part 2 to this makeover, but it’s been almost 2 months now. Are you still planning on blogging about the rest of the project? I really hope you are, because I’m hoping to try the Airstone product on my fireplace.
P.S. I just love your blog 🙂
Hi Alicia! We are definitely still planning on blogging about the rest of Keith’s makeover. We’ve both had a lot going on the past couple of months, but we’re looking forward to getting together in July! 😀
I love the barnwood you used! I am currently working on updating our fireplace in our new home. We recently found built-in bookcases when we removed false walls on the sides of the fireplace 🙂 I have some old barnwood that I want to use to build a new mantle…similar to what you made. My wood is much more gray. Did you stain yours or just clean it? Thanks!