Greetings!
Today we’re gonna attempt to show you how we made the Pottery Barn-style mirror we used on our mantel.
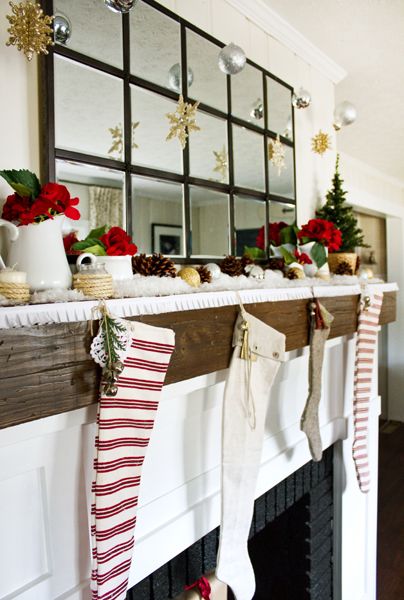
We recorded a short video about it (which you’ll find at the bottom of this post) but before you watch it, I’m gonna walk you through the process using photos & drawings.
The first thing you’ll need to decide is approximately how big you want your mirror to be. Once you know that, you can shop for your mirror tiles. We got ours at Hobby Lobby, and they measure 8″x8″. They were regularly $3.99 a piece, but we scored all 15 of ours during a 40% off sale. They’re located in the candle section of store because they’re normally used to make tabletop centerpieces.
The next thing you’ll need to decide is what kind of moulding you want to use around the edges, and in between each of your mirrors. We used some plain, 3/4″ wide, wood moulding. The bottom side of it is completely flat, and the top side of it has slightly rounded edges. We bought four, 8′ lengths of it, and that was just the right amount for our mirror.
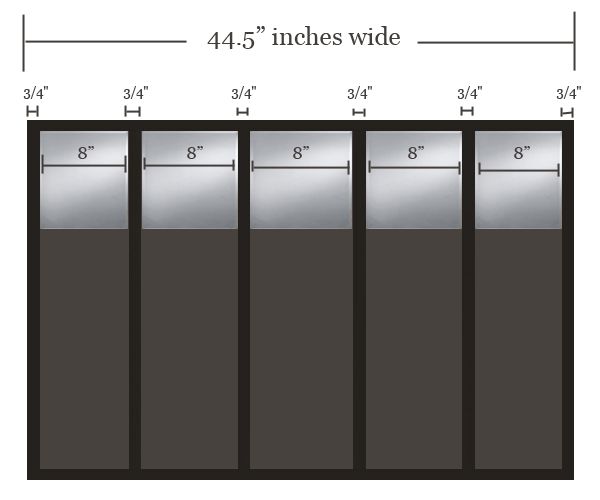
Once you have your moulding, and your mirror tiles, you’ll need to do some math. (Did I just hear you groan?) To determine the exact width of your mirror, you take the combined width of each mirror tile and each piece of moulding. Sorta like this…
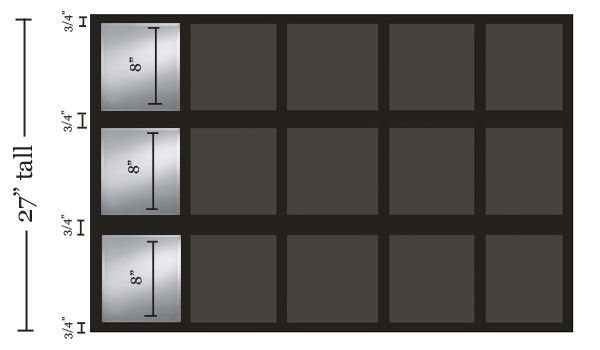
Do the same thing to determine the height.
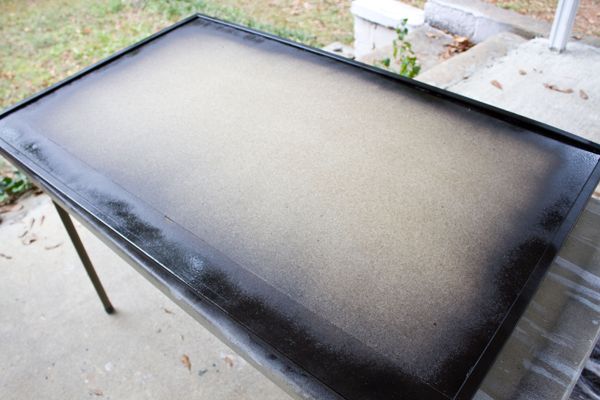
Once you’ve determined the exact overall size of your mirror, you can decide what type of wood you’d like to use as the back of it. We chose particle board because it was the cheapest option. You can find 2’x4′ pieces of particle board (or any other type of plywood for that matter) at almost any home improvement store.
Since our mirror needed to measure 27″ high, we had to attach an additional piece of particle board to the top of it to make it the right height. Like this…

(PS- For extra stability, we squeezed a line of Liquid Nails between the two pieces of particle board before we added the bracket.)
Once that additional piece was securely attached, we used our circular saw to cut our “newly-sized rectangle” down to be the right size width-wise. (44.5″)
So that we could have the option of hanging the mirror vertically, the next thing we did (and this is a totally optional step, by the way) was add two 1″x4″ pieces of wood to the back side of it. We attached them first with Liquid Nails, and then with 1-1/2″ long wood screws. We did this step at this particular time because I thought it would be easier to add the 1″x4″s, the picture hangers, and the wire before we attached the mirrors to the front side.

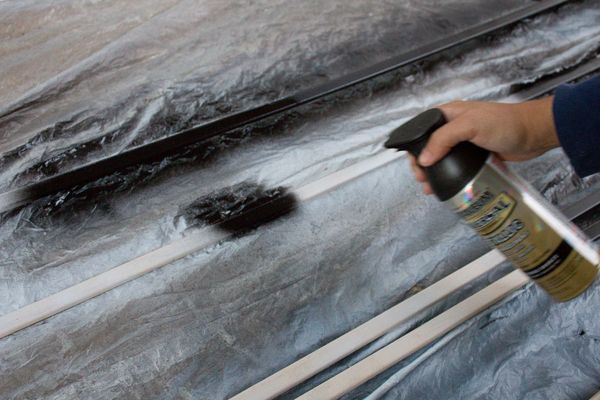
Next, I sprayed all four pieces of the moulding we bought with Rust-o-leum’s “oil-rubbed bronze” spray paint…
Then Kevin mitered the ends of the ones for the edges of our mirror, and I glued them down (with wood glue) and sprayed them with more spray paint…
I actually sprayed the entire front side of it with spray paint, but I stopped taking photos after I snapped that last one, so I don’t have a picture of it.
Here’s a drawing instead…

That last step is an important step, because if your measurements aren’t exactly right, you’ll be able to see raw particle board or plywood in the small gaps between the mirrors and the moulding. Your “mis-measurements” will sort of disappear if everything is all painted oil-rubbed bronze.
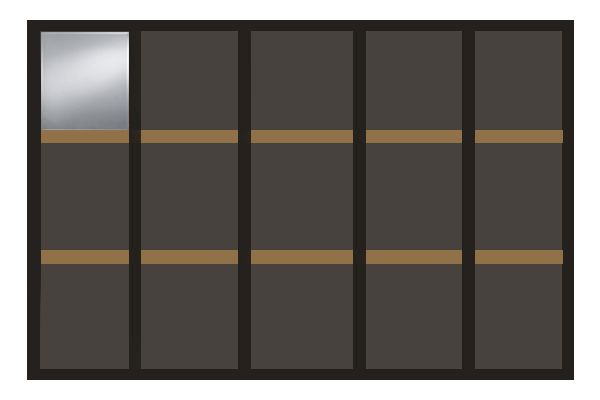
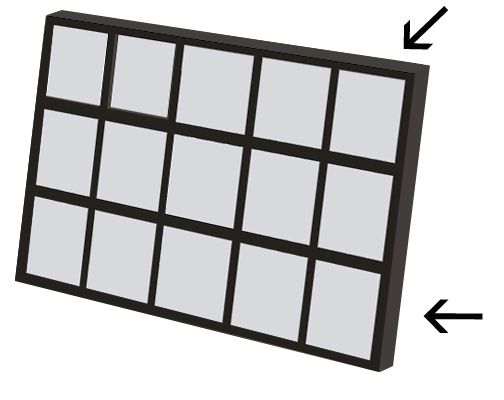
After that, we cut and attached the vertical pieces of moulding. Like this…
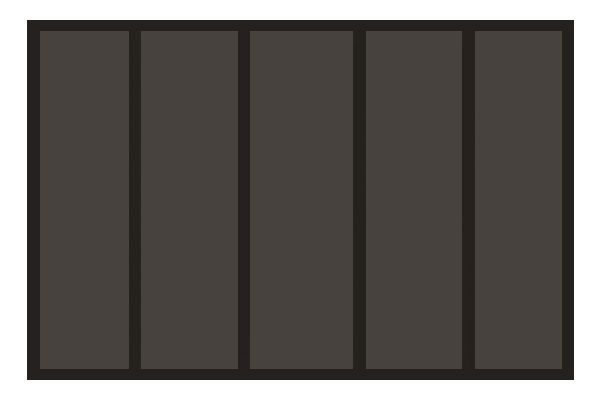
Then we cut and attached the short, horizontal pieces of moulding. Like this…

(I colored them tan so you could see which ones I was talking about.)
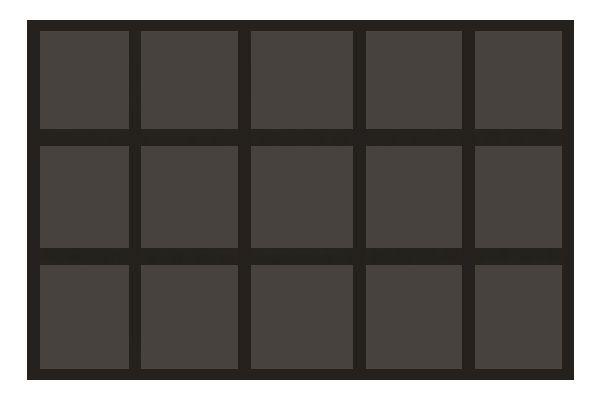
Helpful hint: Use one of your mirror tiles as a guide as you glue your ALL of your pieces of moulding into place. That way you can make sure each mirror tile is gonna fit once the wood glue is dry.
(Just hold a mirror tile inside each “square” as you go to make sure it’s gonna fit before you glue the moulding into place.)
After all the moulding is attached, give the whole thing another quick coat of spray paint, so it looks like this…
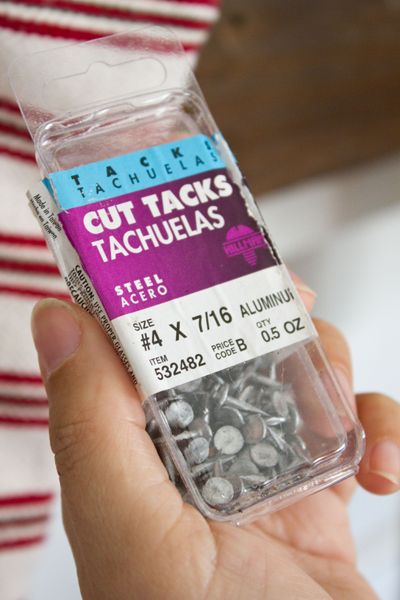
After the spray paint is dry, use wood glue and a “cut tack” (ours came from Lowes) to attach a plastic mirror rosette to each “cross-section”. Like this…

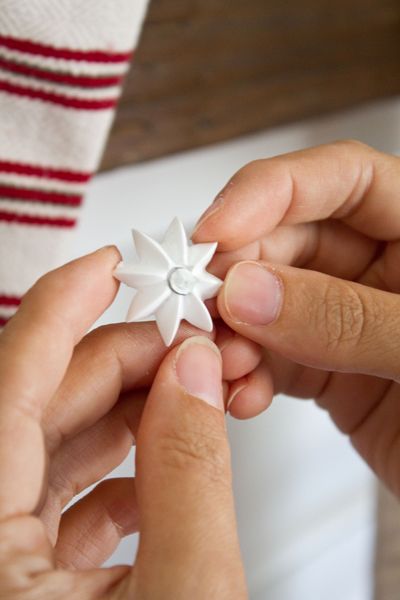
Give everything one last coat of spray paint when you’ve got them all attached…
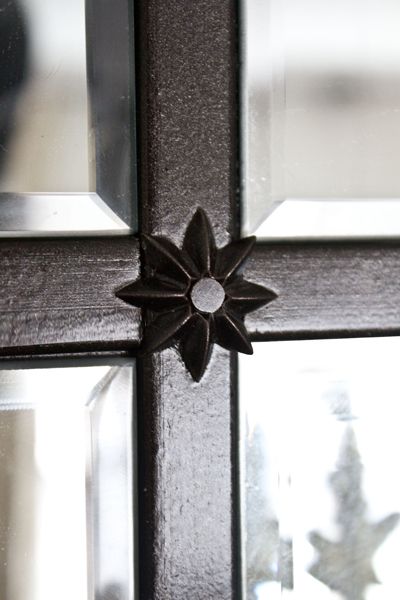
(Our rosette)
Pretty close to the Pottery Barn ones, eh?
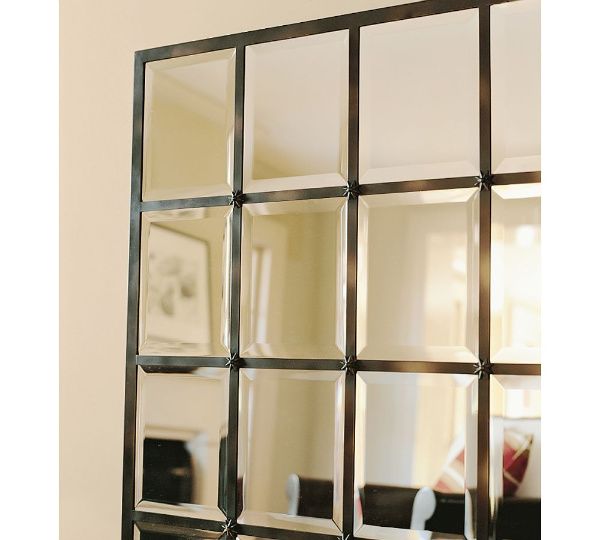
(Pottery Barn’s “Eagan Mirror” rosettes)
After that, all you have to do is attach your mirror tiles with some mirror adhesive and voila! You’re done!
I recorded a little video which sort of shows what I described in the photos and drawings above…
(You can watch it on YouTube too.)
And last but not least, we’re thinkin’ we’ll eventually add some trim to all four sides of our mirror. Not only to make them look more finished, but also to cover the gap between the wall and the mirror, created by the 1″x4″s on the back side. Like this…
But that project will have to wait for a while…we’ve got some floors to refinish first!

——————————————————————————————————–
Join us on Facebook or Twitter!


————————————————————————————-
Need help arranging your furniture?
Need design help?
Check out my e-book!


Layla,
While I absolutely love this mirror the skill level might be over my DIY pay grade, but wow, you guys did such a great job and I love how it turned out.
Karen
oh.my.gosh. i love this! i’ve been wanting a floor to (almost) ceiling mirror for the master bedroom for soooo long but you must know the price tag that accomodates such mirrors. this project SEEMS simple enough and would be so stunning! thank you for being creative genuises and for sharing that creativity with all of us!
on a sidenote: Layla, i noticed in a room makeover you did (i have no idea when nor can i recall how long ago it was) but you used galvanized gooseneck lighting that you said came from Lowe’s for $18 each. that type of light would be perfect for my sons/guest bathroom makeover i hope to tackle soon and what a great price! but i cant seem to find the light on Lowe’s website. can you please help me out??? thanks in advance!
-xo
Amanda
Hi Amanda!
I think you’re referring to the galvanized outdoor fixture that’s only available in stores.
LOVE that thing!
Layla 🙂
I love it too! The look. The price tag. Everything. I’ll be heading to L***’s to check it out in store, but Ssshhhhh, don’t tell the hubby, who is employed by Home Depot. 😉
Thanks so much for the info., lovely.
Xo
Amanda
Wow, that looks fantastic. Thank you for the tutorial!
Hi Layla,
Just wanted to give you my email for the rosettes once you start sending them out. How will you sell them? Paypal? I’m almost positive I was one of the first few takers, but let me know if they’re still available. I’ll need about 12. My email address is [email protected].
Thanks!!
Jenny
Your Tampa Fan
I’m totally going to try to make this. I love, love, love it. Thanks so much for the tutorial!!
Thanks so much for the tut.! You guys did such a great job on the mirror. I love it!
I can do that! What a great explanation and an even better idea! LOVE IT!!!!!
The Mirror looks great and is very close to the original. I don’t think anyone would be able to tell at a glance. I really love it! Great Job you guys! It would look great any size…….I may have to try this one 🙂
Wow, that looks fantastic. Thank you for the tutorial!
I believe this is my favorite DIY project to date. LOVE LOVE LOVE it!!! I’ve been looking for “mirrored” windows to hang on either side of our fireplace in the living room because we only have one single window in the room and I’d love to get some more light bouncing around in there. I’ve asked for tools for Christmas (!!!) and if my requests are granted then I’m going to be tackling a couple of these babies. So THANK YOU THANK YOU THANK YOU for this tutorial in advance 🙂
This looks so much like the PB one! I saw your post about the bed for your bedroom that you painted and I just picked up a PB Bellora knock off chandelier for my office via overstock….used the same paint to “bronze it up” even more. Thanks for the idea guys!
I believe this is my favorite DIY project to date. LOVE LOVE LOVE it!!! I’ve been looking for “mirrored” windows to hang on either side of our fireplace in the living room because we only have one single window in the room and I’d love to get some more light bouncing around in there. I’ve asked for tools for Christmas (!!!) and if my requests are granted then I’m going to be tackling a couple of these babies. So THANK YOU THANK YOU THANK YOU for this tutorial in advance 🙂
I am so completely inspired… I agree with all the folks that say this is their favorite DIY project to date. I have to move soon and one of the things that helps keep my spirits up about it is the thought of re-decorating in a new place someday… this goes on my short list of what I’d like to use!!!
Thank you for sharing 🙂
We made this mirror a few days ago and it turned out SO great! Ours ended up costing about $80 and we only did 12 of the mirrors. Thanks for the awesome tutorial!
http://www.beingbrook.com/2011/01/mirror-inspired-by-pottery-barn-eagan.html
Brilliant!
I was at our local Downeast store last night and found this exact mirror for $370.00 It was tagged as “sold” and tucked away but I HAD to check it out. You did a magnificent job on the recreation Layla & Kevin, right down to the rosettes. Sending rip roaring cheers from a southern Utah fan!
About how much does the finished mirror weigh? I would love to recreate this, but our walls are a little sensitive since we live in an older building and we unfortunately can’t put screws in our walls (we’re renters).
I cannot access this video or instructions, photo of the finished mirror and am VERY interested in doing this as well. Can you offer any help so I can access?
THANKS!
Thanks for tutorial! We tried our hand at this project and it came out great!!!
http://baaremans.blogspot.com/2011/02/pottery-barn-eagan-mirror-diy-project.html
Hi – please let me know what you used to attach the very heavy mirror to the wall. Thanks
Perfect! Thanks for the link. I already have some mirrored tiles, which I’ve used to place candles on. I can’t wait to try this. A nice little surprise was the rosettes, which I couldn’t see in the original picture. Now…just to find some in Australia. Thanks guys!
love it!! you are incredible and cute,
excuse my language because the frenchy 😉
Julia
I’m doing it this week!!!!! Thanks for the great tutorial!
Just finished mine up this week. It came out good. Thanks for the tutorial and instructions!
If anyone in the northern new jersey area needs help building one, give me a shout. I am currently unemployed and have lots of free time on my hands!
Thanks for the awesome instructions! I finally got around to making this. http://knitting-jenny.blogspot.com/2011/11/knock-off-of-pottery-barn-mirror.html
LOVE this! Can’t wait to try it.
I want to make this mirror so bad! Anybody have a web link or ideas where I could find the rosettes? I have no idea where to start. Thank you for any help!
I found rosettes (although clear) at Lowes the other day in the section for picture hangers. The cut tacks don’t fit with them though so skip buying those but they come with screws as well as another piece of plastic that finishes off the center quite nicely. Was cheaper than paying shipping ordering online too! LOVE how the mirror turned out! Frustrating though that after all my calculations not all of the mirrors I got from Hobby Lobby were exactly 8×8…there was definitely some slight variations.
This is wonderful. I want one! Duly bookmarked. Thanks and Happy Thanksgiving!
Love the mirror, but am dying to know about the stockings in the first photo! They are so cute, purchased or diy?
I love this mirror! I bought all the materials before I really thought the whole process through….do you have any suggestions where I can take my wood moulding to be cut and mitered? Lowes cut my particle board down to size but couldn’t do the moulding because their saw would ruin the wood. I’m so anxious to start this project!
Thanks so much!
We did this! And I love, love, love it!! Thank you for the tutorial!
I ADORE your mirror! Found it by accident and now must make it! Thanks for sharing!
I am in the process of making the mirror right now. I was wondering, did you take those little foam pads off the back of the mirrors? I think they would look better raised up to the same height of the trim, but I’m afraid they won’t stay on. Do you think I could just glue those to the board? Thank you!!
Brilliant. I cannot tell you how thrilled I am to find this post. I have coveted that Pottery Barn for YEARS! But could never justify the price. Thankyou for figuring out how to do it, then sharing it.
Hi, I’m wondering what size the rosettes you used are. 3/4″? 1″?
Thanks for the tutorial, I’m in the building process right now. 🙂
THIS IS FOR THE EAGAN MIRROR PROJECT, WHY CAN’T I USE CLEAR ROSETTES? ALSO WHY DO YOU USE MIRROR ADHESIVE INSTEAD OF REGULAR GLUE? I WOULD APPRECIATE YOUR HELP. THANKS SO MUCH . I LOVE THIS MIRROR ,BUT COULD NOT AFFORD IT.
Hi Sheila! 🙂
You could definitely use any kind of rosette or embellishment, and we used mirror adhesive because it is made to hold up mirrors. Have fun with your project, and happy decorating! 😀