Happy Monday, y’all! 😀
Did you have a good weekend? We sure did! We even finished up that DIY project I told you about last week. It was inspired by this mirror from Ballard Designs:
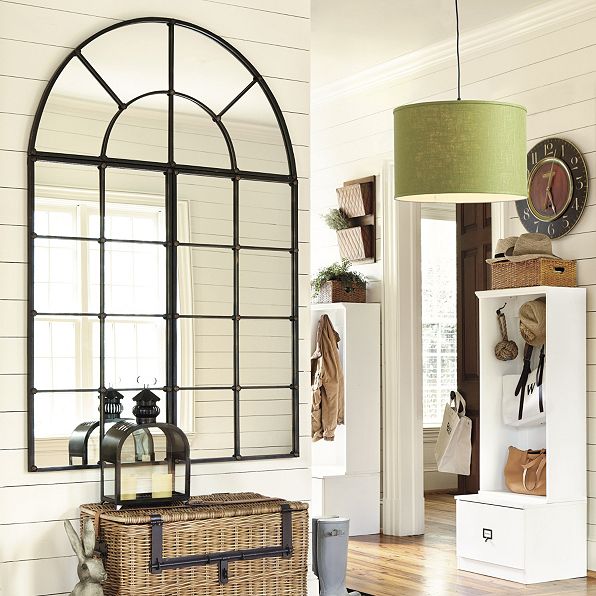
That one sells for $549, which was about $500 over our budget, so I decided to see what I could whip up for $50 instead. Here’s what I came up with:
Step 1: Purchase three ($5.88) door mirrors from Walmart:

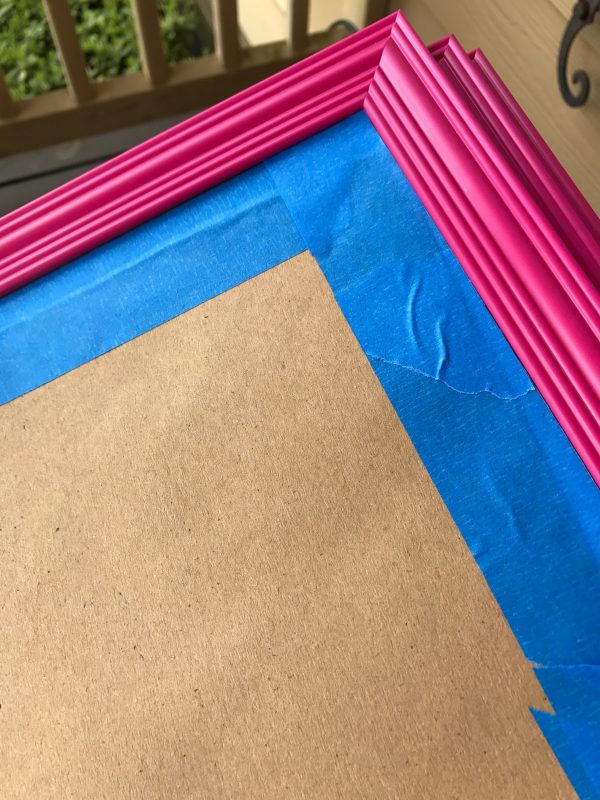
Step 2: If you had to buy pink ones because they were out of black ones (like I did!), tape off the mirrors and spray the frames black:
Step 3: If the pink color on the underside of the frame is still reflecting on parts of the glass…
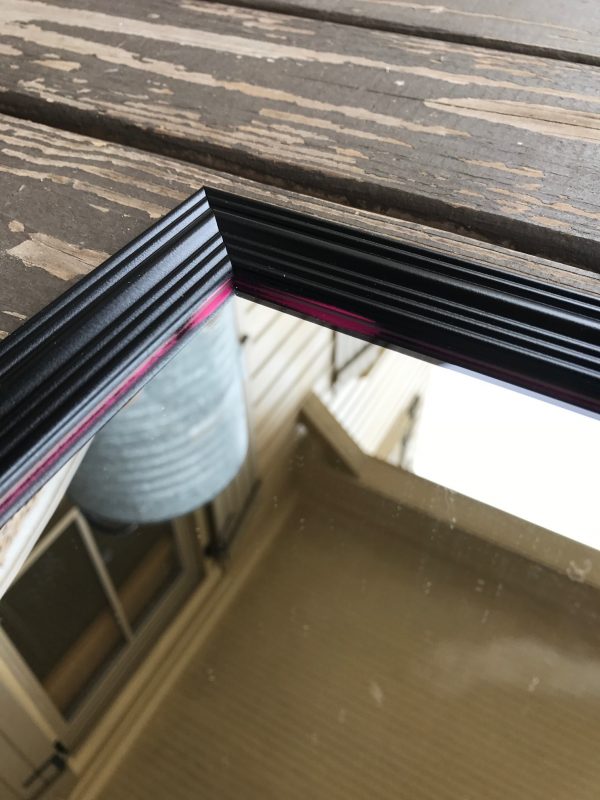
…use a small paint brush to touch it up:

Step 4: Scrape off the excess paint when it dries:

Step 5: Chop nine pieces of trim molding:

Step 6: Spray the backs and front of each piece:

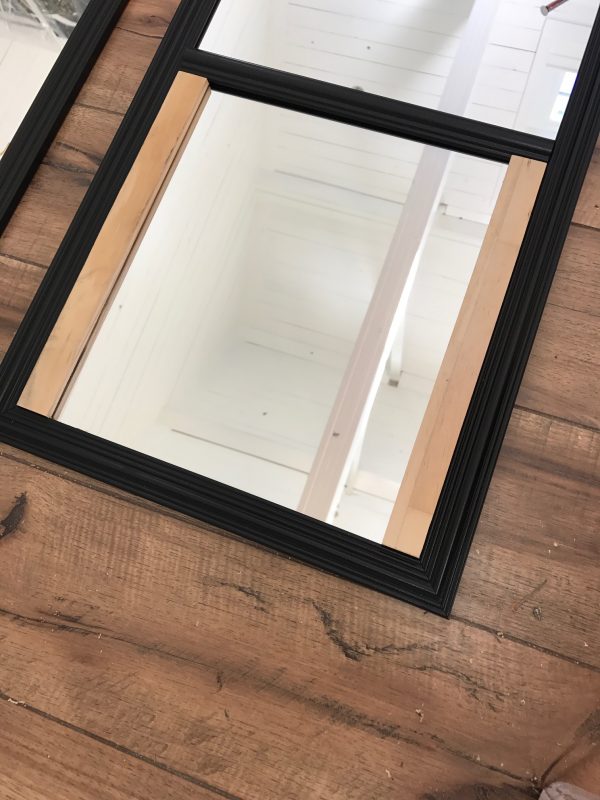
Step 7: To create the window pane effect, use E-6000 to glue the nine pieces of trim molding to the mirrors, using scrap wood “spacers” to keep the trim pieces straight and evenly spaced apart:
Step 8: Attach heavy duty, double-sided foam tape to the back of each mirror:

Ours was Scotch brand “Outdoor” tape made to hold up item that weigh up to 15 lbs, and each of our mirrors weigh 5 lbs.
Step 9: Stick the three mirrors to the wall using a board or level to make sure they stay straight.

Note: Each of our mirrors were a *slightly* different size, so we ended up lining ours up across the top (vs. the bottom) because that’s the edge that’s most visible.
Here’s the *almost* finished product:

To mimic the shape of the Ballard Designs mirror, I’ve got something arched up my sleeve this week, so I’ll be back on Friday to show you what I’m adding to the top! 😉
Layla
PS- For those who aren’t on Facebook and have asked me to include it here each Monday, here’s a link to this week’s LuLaRoe pop-up: https://www.roewith.me/s/JDptr77wq XO

Even the rectangular version looks great.
Thank you for the details. I would look at an aisle of glue and walk out empty-handed because I’d be overwhelmed (and sure that if I bought something it wouldn’t work).
How clever you are! Thanks for the name of the glue.
I think it looks really great without the arch!
What a great DIY project! Looks terrific.
This is genius! Great idea.
This is great!!!
So clever!!!! I love this <3
Wow! Awesome job! It looks great with the piece underneath. Where did you purchase that?
Thanks! That console came from HomeGoods! 🙂
LOVE! I am planning a similar project with some $15 mirrors I purchased from a used hotel furniture store. They will go in our dining room and be black frames as well–thanks for the inspiration!!!
The heavy duty double sided tape will hold all that? I would be afraid it would fall off the wall. Can you share the brand of double tape you used?
Sure Regina! I got Scotch brand “Outdoor” tape. It’s actually a double-sided foam type tape and 60″ of it can hold up to 15 lbs. Our mirrors weigh much less than that at 5 lbs a piece. 🙂
Amazing, and so creative!! I am in AWE. Can’t wait to see the finished product!!!
Wow! Talk about getting Bang for your buck! And all that you saved! Those look wonderful, and I can’t wait to see what creative thing you have for the arched top!
So is it for your house or Katie’s?
I tore this exact page out of the Ballard Catalogue for that mirror! I can’t wait to see how you finish it off, I’ll be making one of my own for sure! 🙂 Also, that shiplap! It makes me want to cover my whole house.
Layla, these turned out great! 🙂 Liz
That looks awesome Layla! I’m assuming that this is going into your in-laws house?
Yep! 🙂
Knowing you it’s going to be something super cool like a rustic wooden arch! I can’t wait to see : )
You two are the best!! Can’t wait to see the arch up your sleeve. 🙂
Always wondered how I could make a similar ‘window’ mirror. Now I know! Great job guys!
Love this idea. I actually have some old panes (and old pains). I could easily pull this off.
Thanks!
Brilliant!
Nice! Sonny didn’t help?
Love this!! Can’t wait to see the finished product! ❤
Gotta love those cheap mirrors! I always snatch them up at thrift stores or on sale at the local “everythingmart”. The ways they can be modified are only limited by one’s imagination. Great idea!
This is brilliant! I love when you show us how to get the expensive look for inexpensive!
I might use this when I help my parents refresh their guest room! I think they are wanting more of a “seaside” feel for their guest room (funny since we live on the prairies but mum is British) but maybe painting it white -instead of black- would change the feel of it.
Nevertheless, very neat!
I love this project! Can’t wait to see how you created the arch! Thanks so much for the inspiration! 🙂
Wow, this is a great idea! Looks way more expensive than it was.
Fantastic idea ! Thanks for such a detailed post🙂 One question, what condition would the wall be in with the removal of the tape? I’m wondering in the case of an apartment?
You could use Command Picture Hanging strips, which are command adhesive strips on Velcro-like fasteners. The large size holds 16 lbs. I have had great luck with them holding up pictures both at home and in my workplace. https://www.amazon.com/Command-Picture-Hanging-12-Pair-17206-12ES/dp/B00LOQMCDM/ref=sr_1_4?ie=UTF8&qid=1489026486&sr=8-4&keywords=command+picture+hanging+strips