“What if you just did it your own way? No rules, no right or wrong, just what you think is beautiful.”
-Sandra Magsamen

Remember that old wooden frame I put Sweet P’s bubble print in?
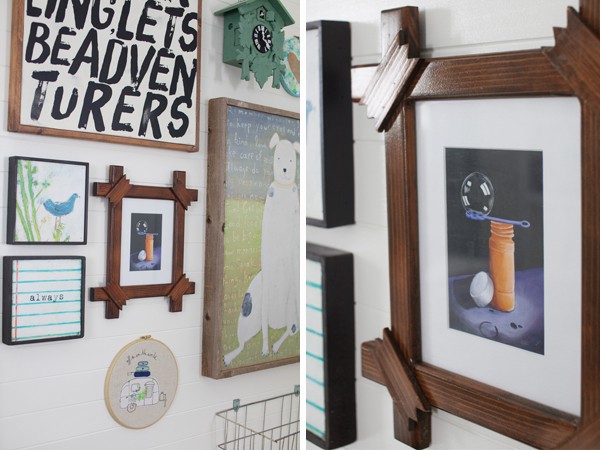
I actually had two of them. I purchased them for $3 each at a flea market last year. The second one has just been sitting in Sweet P’s closet, but I finally found a place to hang it this week. I decided to paint it with some leftover ‘Gray Cashmere” paint and distress the edges first though. Here it is before…

…and here it is now:

The photo inside is actually page 40 from the September 2014 issue of Country Living magazine.
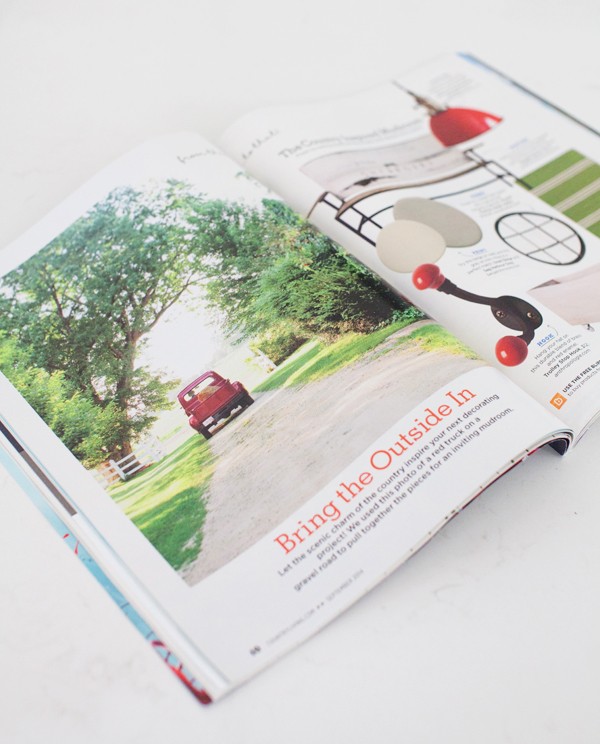
(Photo by: Monica Buck)
I knew I wanted to frame it from the second I saw it, and when I painted this little truck the other day…

…I knew exactly where it should go!

To frame the page, I used an exact-o knife to cut it out of the magazine, and then positioned the glass from the frame on top of it so that I could cut around it. Next, I used the glass as a template to cut a rectangle out of a piece of white card stock.
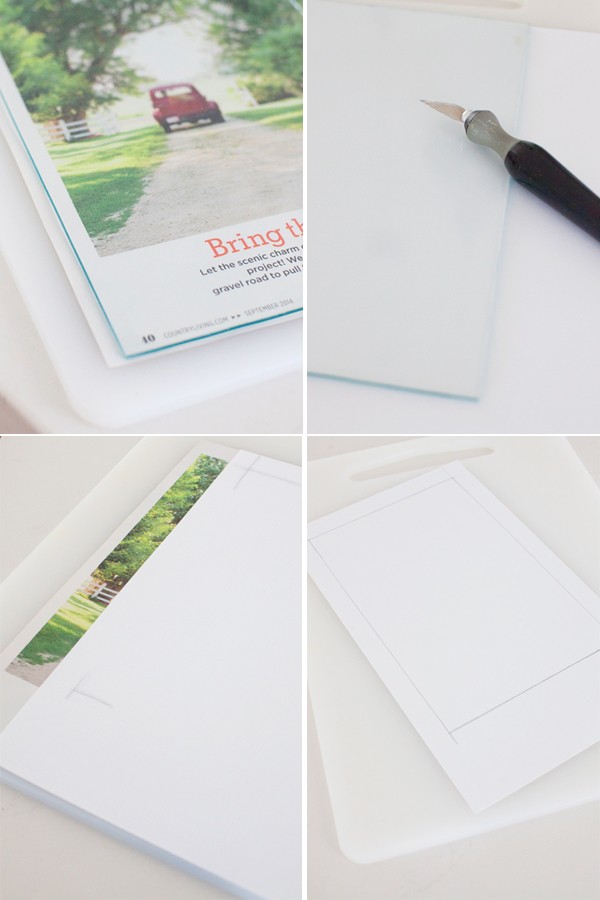
After that, I flipped the card stock over (so the wrong side was facing up) and made some rough pencil marks where the mat opening would need to be. Last but not least, I used a ruler (and my pencil) to “connect the dots”, and then I cut out the section in the middle to create the mat opening.
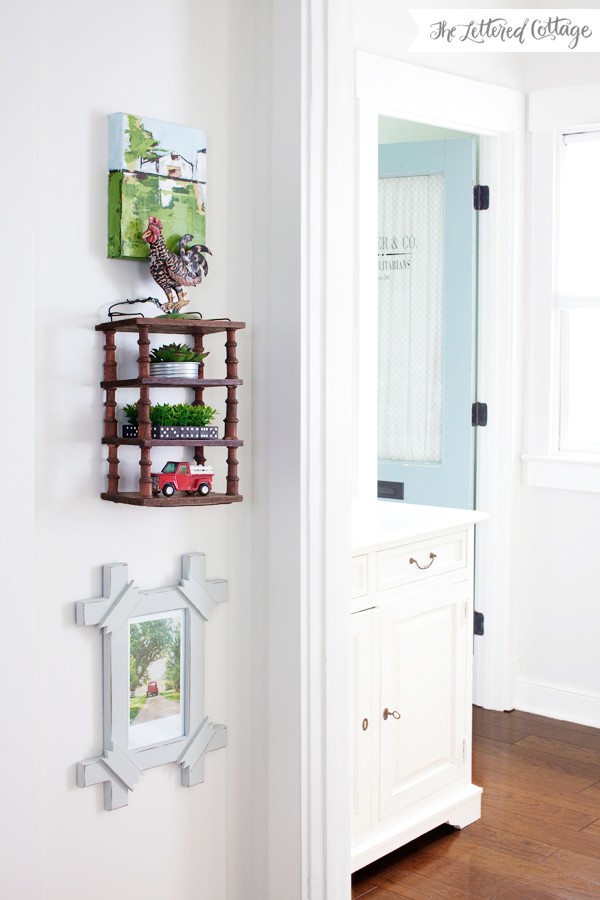
My favorite thing about working on little vignettes like these? No rules, no right or wrong…just having fun with beauty-full things. 🙂


Very cute!
Thank you, Marianne! 😀
I LOVED that quote you used at the beginning. It’s lovely. I wanted to see if I could find it as a graphic somewhere (as people love to take quotes and make them pretty), and I discovered that the actual author of the quote is Sandra Magsamen. I found it here: http://tinyurl.com/osrhulb
Just wanted to let you know! Thanks for all your lovely inspirations! ^_^
Ack! Thank you for the heads up, Gabby. I’ll edit it now! 😀
I LOVE how you work with things you have. No mat cutter, expensive mat, or photos that could cost a fortune. Honey, that’s my kind of decorating!
Thank you, Peg! XO
Adorable! I immediately thought of the truck you had on the shelf, and how nice it would fit together..
Oh yes, I like the frame much better painted and distressed!
Layla,
I can only imagine how little Sweet P’s eyes will light up when he enters his room. You have put so much love into it with every single detail. I can’t believe you managed to find a truck almost identical to the print you had saved.
So creative. It looks so cute all put together.
Layla, I just wanted to tell you I follow many blogs of talented ladies like yourself. I started following them because of their decorating style, craftiness, recipes or because they could turn an old dresser into something beautiful with just some paint but I get so much more than that. I have three children and four grandchildren and when I read your posts and see the beautiful space you are preparing for your son and see pictures of his cute little fingers I get so excited for you. It’s so funny because I don’t know you personally but yet I’m so excited for you. I can just see the smile on your face as you were hanging the little truck picture in his room. It’s a beautiful space. We live on a farm so I love the little red trucks. Enjoy this time.
Ahh!! I wish I would have kept my issue. I love that photo. Awesome idea. I really love his room.
It looks fabulous!!! Little by little sweet “P’s” room is looking great!!! Happy to read that you’all be seeing him again!!
Now all you need is the toddler board book, Red Truck, by Kersten Hamilton. I recently retired from teaching kindergarten and will look through my boxes. I will let you know if I locate it. 🙂 The little truck on the cover is just like yours! As always, thank you for
sharing your creativity.
Hi, Such a lovely post. Thank you for sharing. You are truly such an inspiration to me. I did wonder what the cover of this magazine looked like? I am trying to track it down.
Thanks!
Ashley Olsen
This is so funny because I cut out a photo of an old red chevy pickup from the newest Country Living and framed it Tuesday. My dream is to actually own a 1953 Chevy 3100 pickup…..turquoise or red.
I love the frame you used!!
I love how you share every detail as this beauty- full story unfolds. Thank you for continuing to post through this journey. Sending best wishes and prayers from Montana.
LOVE this! So cute!
Great tutorial. I worked for many years as a picture framer. If your magazine page is printed on a flimsier stock (Magazines aint what they used to be!) spray mount (3m777 is the best)to a DARK smooth piece of matting or cardstock. This will keep the picture from rippling under the glass…expecially if you live in a humid climate.Use dark cardstockto keep any printing from the backside showing through the front. While I’m not up on all the copyright laws, if it is for personal use, you could probably just scan and print on cardstock, and then frame. As always, give credit to the photographer if possible.
thanks for the great tips!
Wonderful suggestions, Bernie. I love getting the inside scoop from people ‘in the know’. Thank you. Love this idea, Layla.
this made me smile.
thanks for that!
I love all of the quotes you dig up and add to the top of your posts. They always seem to stick to my ribs, this one especially. YES! More fun, less fuss!
How about trying the red truck on the middle shelf to separate the greenery? And the truck from the matching photo?
Gotta dig out my CL if I haven’t already recycled it!
Ooh! I like that idea, Carol!
So cute and perfect for the space!
I love this! This little vignette is adorable and he’s going to love it when he comes home! I love when we think outside the box and steer from the “decorating rules” that’s when it becomes really fun. Great and easy project
Lauren Baxter | LB Designs
xx