I’m so excited to finally be able to reveal Tommy’s and Shelley’s kitchen today! The episode we created for The Design Network posted on their website this morning, so if you’d like to check it out, just click on the banner below:

Tommy and Shelley have been such incredible friends to me and Kevin over the past year, and we are so grateful that we were able to work on a room in their house with them.

They have inspired us SO much personally and professionally, so it was absolutely awesome to be able to spend so much time with them last month. We love their kids, too- and it was really neat for Kevin and I to be there with them for so many hours at a time. It gave us an idea of what it feels like to have kids running around, as we wait to be matched with a little one of our own! Ethan (their youngest) told Shelley that I was his “best friend” at one point, and boy did that make me smile! (I’m sure it had something to do with the fact that I gave him three scoops of ice cream while I was watching him one day- LOL!) Our child will probably be about a year younger than Ethan is now (4), so I felt really blessed to be able to talk with him, and hold him, and listen to him. Felt like a mini “sneak peek” of what’s to come! 🙂

This first episode was hosted by yours truly, but this makeover was a total group effort. Me, Kevin, Billy, Suzanne, Tommy, Shelley, Brian, Cade, Lil’ Shane…we all got our hands good n’ dirty on this one!
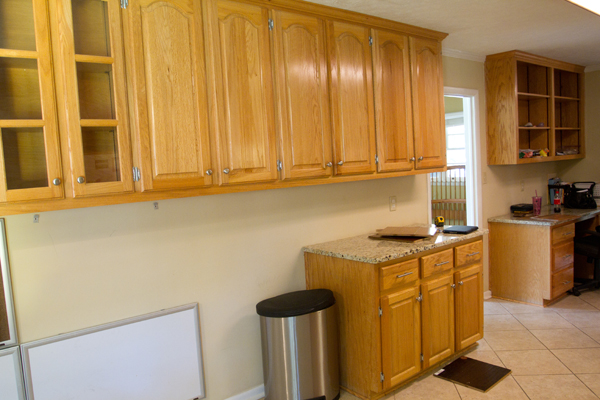
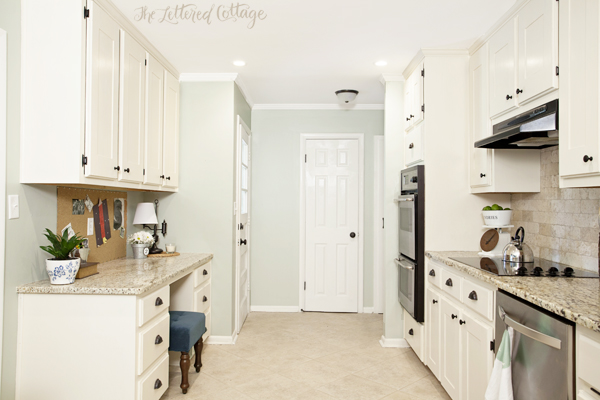
Here’s a look at the kitchen before we started working:
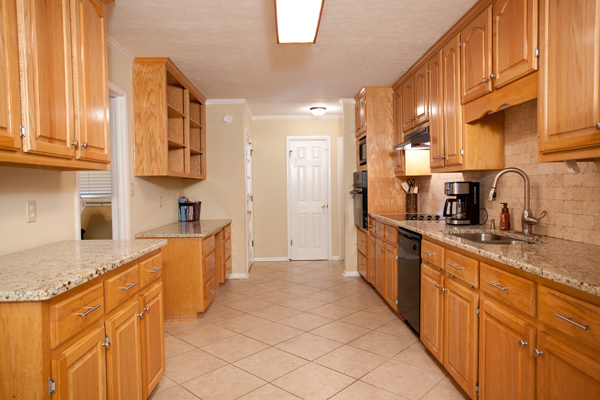
It functioned fine, but it didn’t really *feel* fresh or reflect the family’s bright & shiny personalities.
Tommy & Shelley actually put their house on the market earlier this Spring, because it’s one bedroom too small for the size of their family. Two months after they listed it, they accepted an offer and started house hunting for another house. They fell head-over-heels in love with the very first house they toured, and they were so excited about the idea of moving there! The people buying their house wanted to close before they would be able to purchase the new house though, so they went ahead and moved all of their things into a storage unit in the next town over.
Then, just two days before their closing date, their buyer’s financing fell through. They were no longer going to be able to buy Tommy & Shelley’s house, and shortly after that, someone bought the house that Tommy & Shelley had hoped to make an offer on and move into. 🙁
They took a week or so to think about how to proceed. Should they put it back on the market, or do some renovating and turn it into a 4 bedroom?
Re-listing it felt super stressful after what had just happened, so in the end, they decided to renovate! First, they hired a contractor to wall off the breakfast room at the end of their (extra-long) kitchen, and turned that space into a bedroom for Ethan. They moved their table and chairs into the dining nook off their living room, and I can’t wait to show you that “new” space in the near future, too.
That’s where we came in. Their granite and backsplash were both pretty neutral, and they weren’t looking to spend a fortune on a completely new kitchen, so we started by freshening up their cabinets.
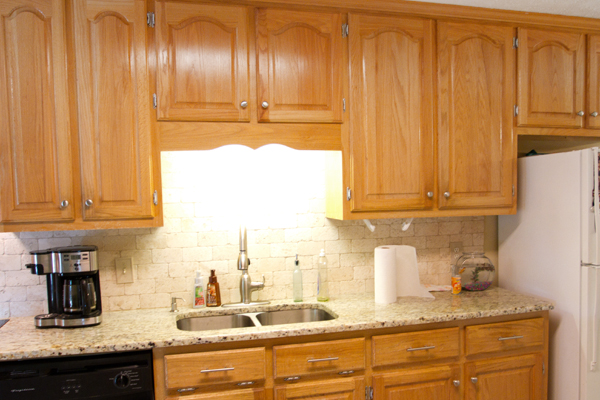
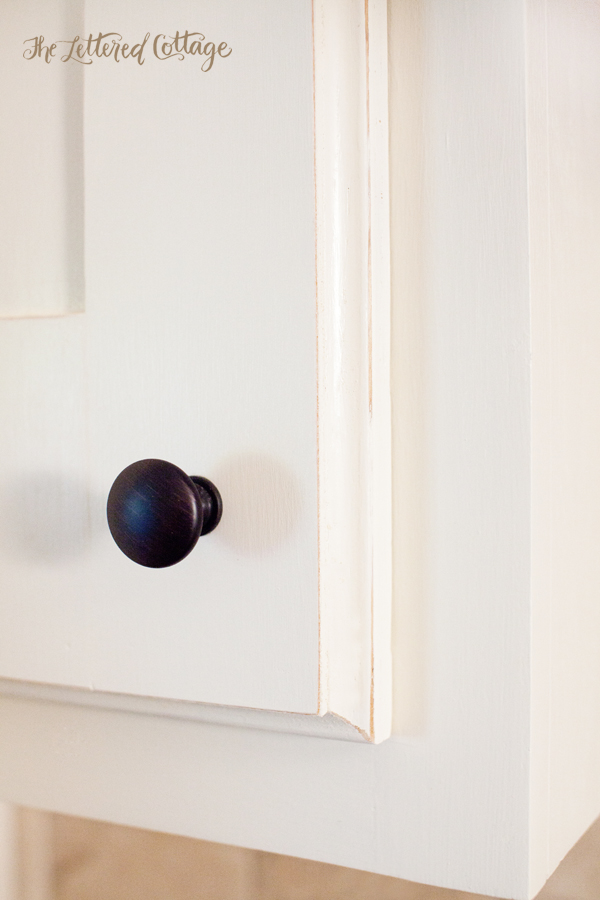
They preferred a more streamlined look, and they weren’t a huge fan of the tone of them. It leaned a little orange, which felt too warm next to their cool-toned counters and backsplash. We went with Benjamin Moore’s Navajo White in semi-gloss (mixed at Sherwin-Williams), and created a shaker style door with one sheet of thin plywood, a pneumatic nail gun and a tub of spackle:
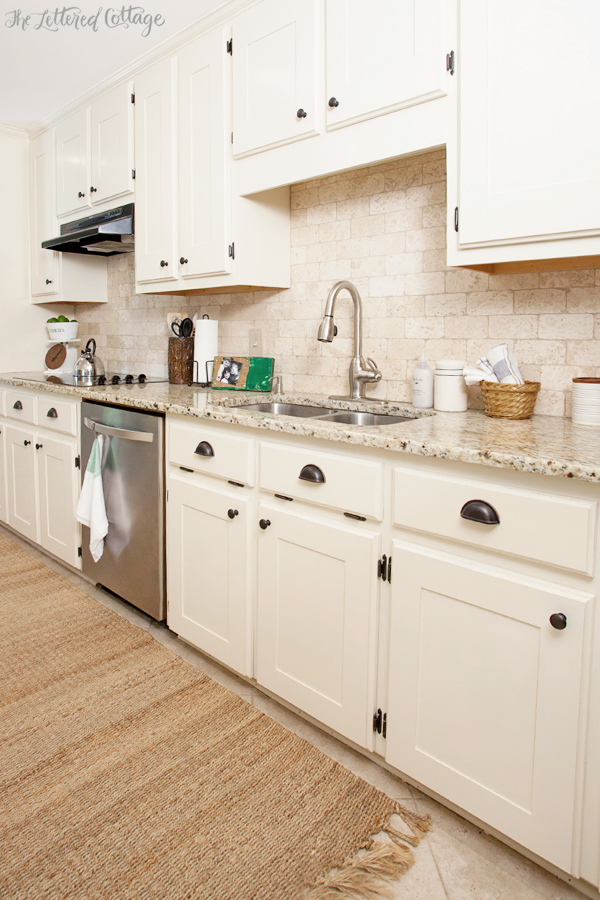
Kevin and I painted (and distressed) all their doors at our house, and we just used a really great primer and two coats of Sherwin-Williams Pro Classic Latex Enamel on everything.
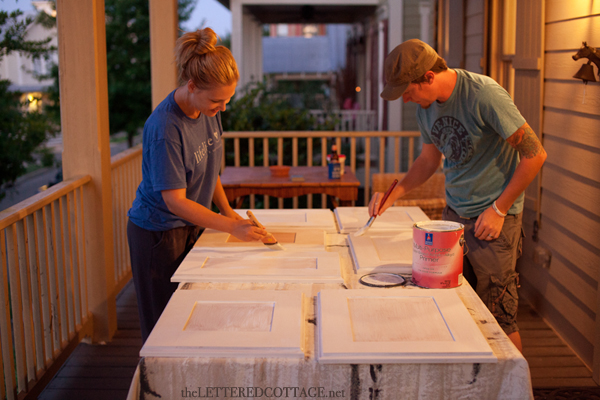
That. Stuff. ROCKS! I’m serious. I wasn’t paid to say that. Tommy forked over almost $80 for a gallon of it, but holy smokes! I have never worked with such a forgiving, self-leveling paint in my life! The description on Sherwin-Williams website says, “It delivers a high-performing, non-yellowing finish that withstands even the toughest wear and tear. This formula goes on smooth without brush or roller marks”, and man- that is the truth!
The hardware we used on the doors and drawers all came from eBay. That’s where I buy all my knobs, pulls and hinges.
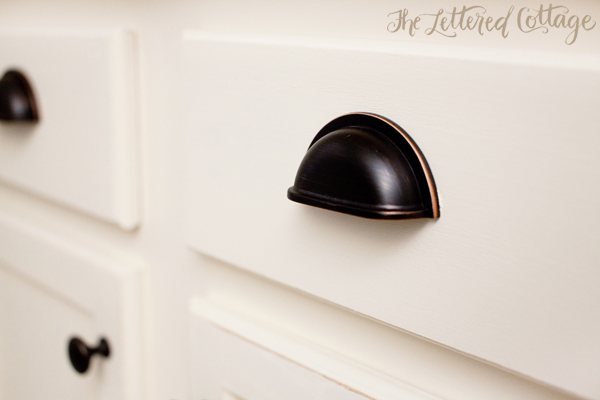
We needed 30 knobs, 60 hinges, and 20 pulls and the grand total for all 110 items came in right under $100. That breaks down to like 90 cents per item! I usually type in something like “LOT of oil-rubbed bronze knobs” in the search bar on eBay, and it pulls up a bunch of auctions hosted by folks who are selling hardware in bulk. The seller I bought this stuff from was offering free shipping at that time, so that was awesome, too. 😀
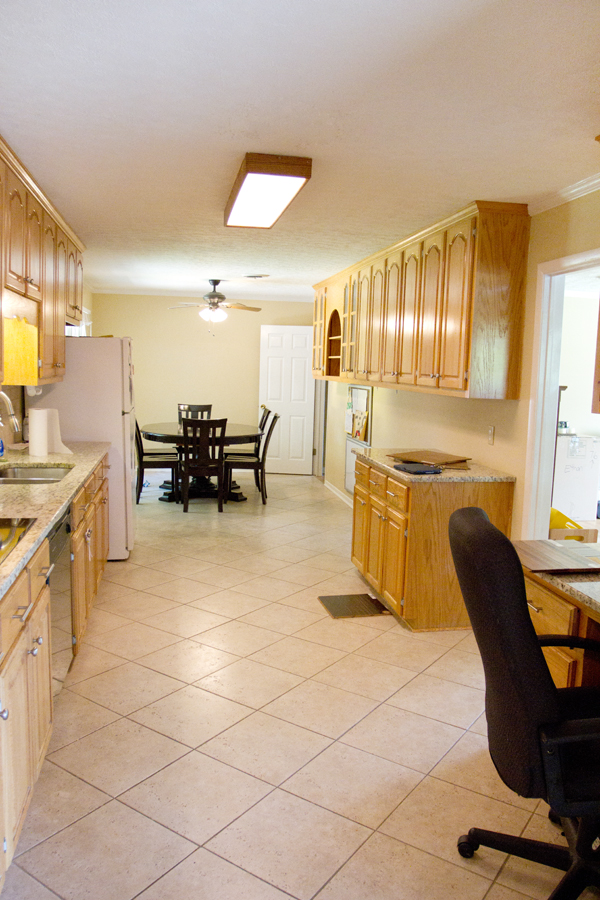
The butcher block countertop area was one of my favorite things to see come together. Before, the upper cabinets continued waaay down into the breakfast area, but the base cabinets were only three feet wide:
We re-used the glass-doored upper cabinets at Keith the Fireman’s house (more about that in a future post), and then re-hung the solid doors on the cabinets above the desk area down at the other end of the room. And although they gained an extra bedroom, they did lose a lot of upper cabinet storage in the process, so we gave them back some new storage on the bottom:
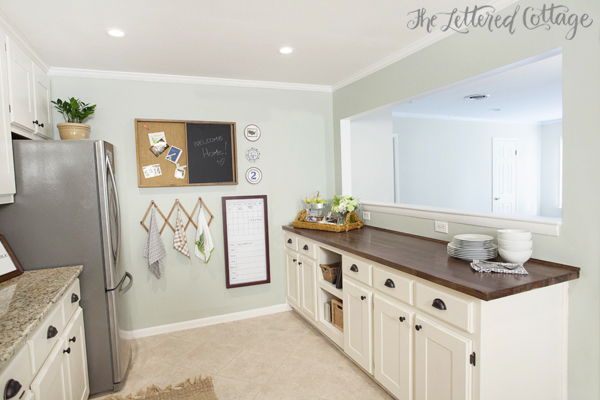
That chunk of cabinets is made up of their three foot wide existing base cabinet, some scrap wood, and a salvaged cabinet Tommy got for free. We topped the whole thing off with a big ol’ slab of butcher block from Ikea instead of trying to find (and pay for) granite that matched their existing granite. Now they’ve got 8 feet of counter space there and the top only cost $169! They sealed it with several coats of food-safe Waterlox, so they’ll be able to get tons of use out of that thing. I love the warmth it adds to the room, too!
And how about that great big cut-out on the wall above it? Even though the kitchen technically got smaller square footage-wise, the room actually feels bigger and more open now. They have plans to put a butcher block bar top on the other side of that wall so that folks can sit there and eat, and interact with whoever is in the kitchen. Can’t wait to show you how that comes together in the future as well!
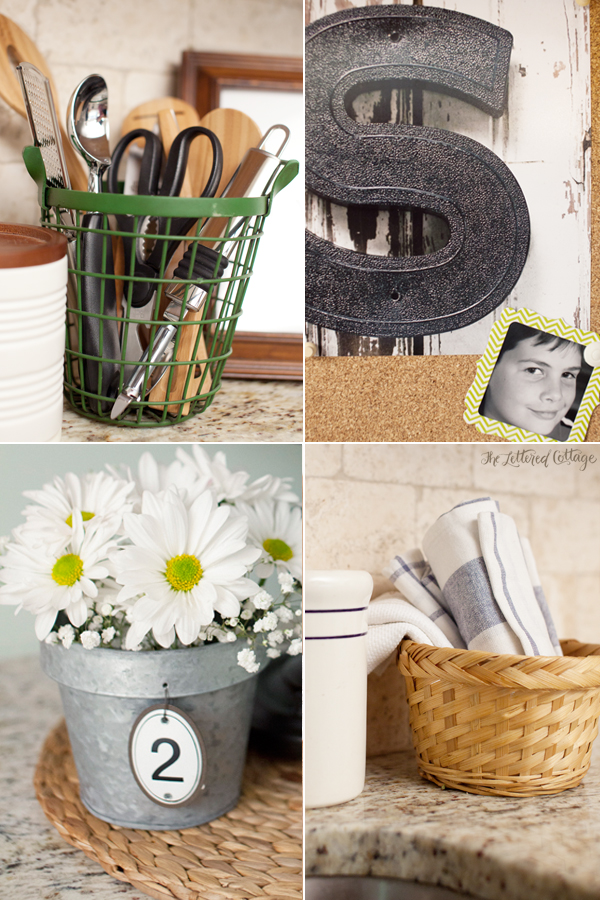
The wall accessories were purchased (on clearance) at Pottery Barn Kids, Pottery Barn, Target, and I got the peg rack on Etsy.
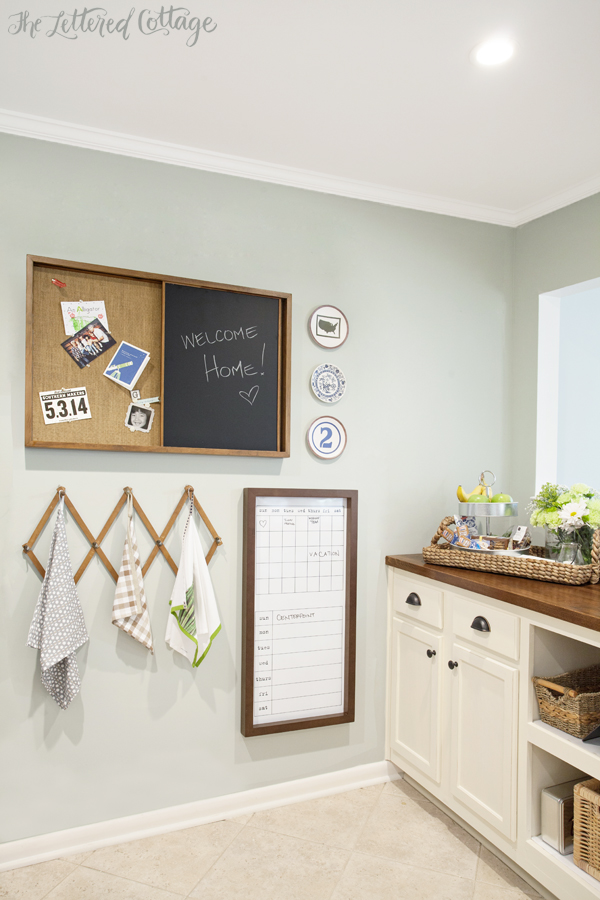
The walls are painted Sherwin-William’s Comfort Gray, and we used some more primer, Navajo White paint, and oil-rubbed bronze hardware over in the desk area. I decked it out with a few simple accessories that they can feel free to keep there, or use in other parts of the house:
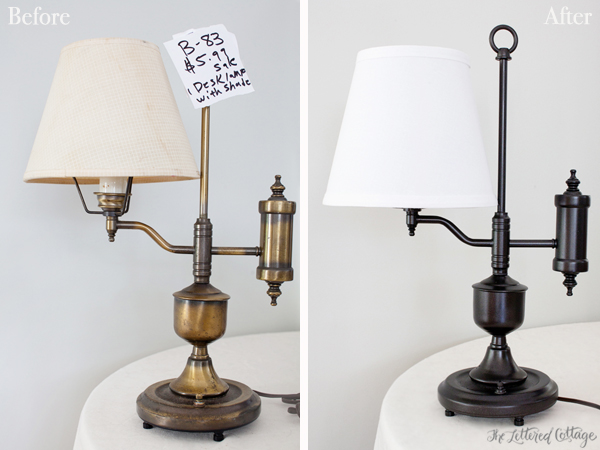
Remember the lamp from this blog post: Brass Lamp Makeover
And the dish towels from this one: DIY Hanging Dish Towels

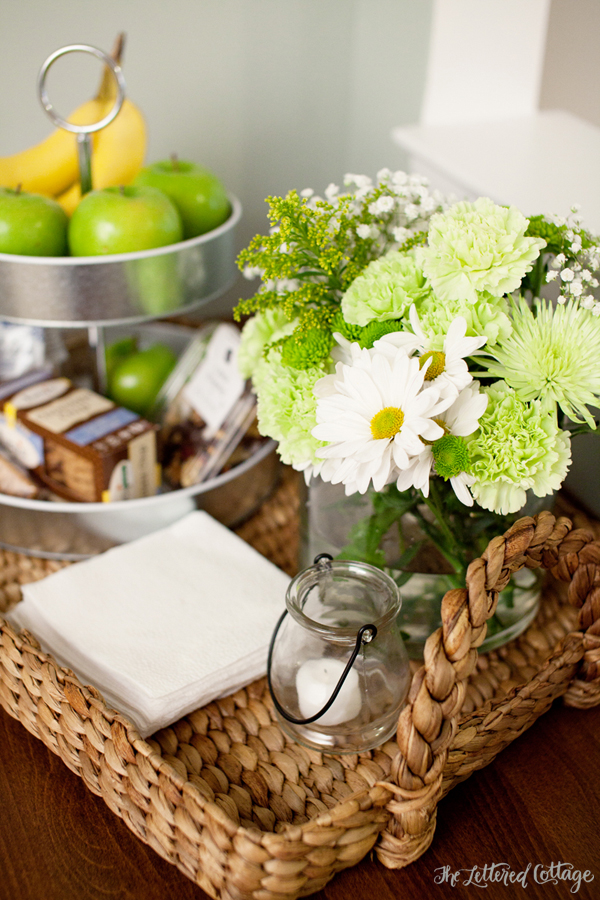
It was so much fun to surprise Tommy and Shelley with them in their kitchen. Thankfully they hadn’t seen them on my blog before the big reveal! 😀 Here are a few more photos of some of things I had fun dotting around the room for them to find:
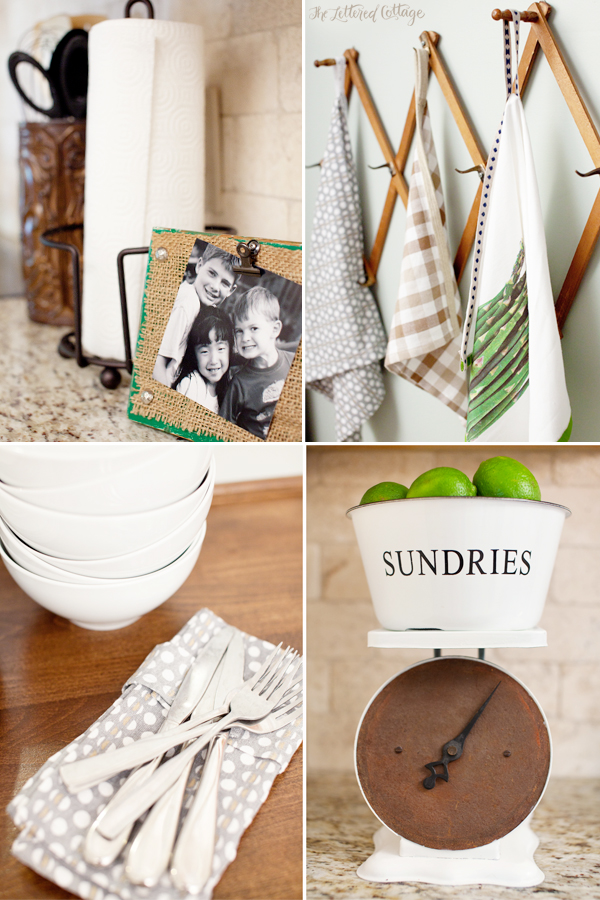
(Green and burlap picture holder by Heather Parrish)

Shelley had mentioned that she didn’t have a complete set of dishes anymore, so we picked them up a set of new dinner plates, salad plates, and bowls at Ikea:
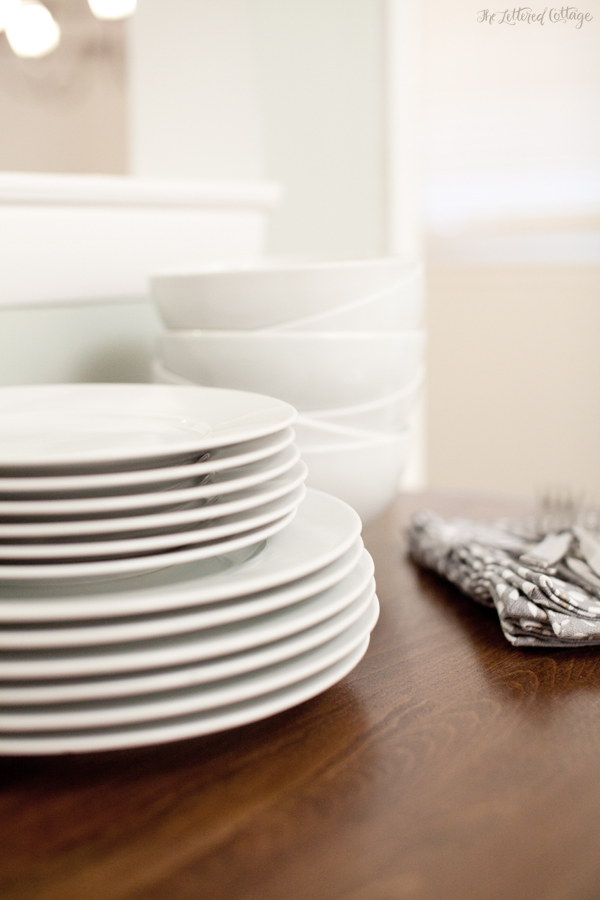
Oh how I love a fresh new set of plain white dishes! Especially when they only cost $34.99 for a set of six place settings!
Our next-door-neighbor, Tammy the Caterer, was so sweet to come feed us at the end of our last day “on set”. We were all completely plum-tuckered, so she swooped in with her fabulous food at just the right time! Bacon-wrapped green bean bundles, mmmmm!

Anywho- to see the whole makeover in action, click on over to The Design Network. And if you’d like to check out episode #2, it’ll post over there on Monday, November 4th! 😀


I enjoyed watching your design video. Your personality really shines through. I love the new blog header. I don’t remember what it looked like before, but I love it now!
It’s beautiful! So bright and happy and open. Great job!
LOVE it!!! You did such a good job!! You are so cute and SO talented!!!
I can’t believe the changes. To have that kind of vision and talent to create these wonderful looks is such a gift! Thanks for showing us.
That pro-enamel paint looks amazing! It’s astounding how much of a difference painting the cabinets makes. Great work!
have mercy, woman! you are going to have me painting cabinets if you keep us this great work.
(that means wow, you are inspiring!)
congratulations on a tremendous redo and a fabulous video. you were so good!
p.s. i do have to tell you that i laughed quite hard at the fire ant outtake at the end. impressed that you were so calm about it!
I just finished watching the video. I loved it! Congratulations, I can’t wait for your next installment. I love the idea of changing the fronts of the cabinets with thin strips of plywood.
Hi Layla! I LOVE this makeover. My husband and I just purchased a house that has a very similar kitchen and we’ve decided to “remodel” it similarly! Question: Your post mentions that the cabinets are painted BM’s “Navajo White”, but I’m wondering if the crown molding/baseboards are also “Navajo White” or if they are a different white? Thank you!
Oops! I saw that you already answered the question above – sorry!
LOVED watching the video and the transformation of this kitchen. I have followed your blog for some time and watched your renovation of your previous home (loving what you did) and your projects on your new home.
How frequently will you be doing episodes on the Design Network? So looking forward to more of your work!!
It looks AWESOME!! I got some great ideas for the remodel of my own kitchen, thanks so much!! Can’t wait to see more of your work!! <3
Looks great! Do you have to put poly or anything over the cabinet paint?
We have the same cabinets, with the orangey hue to them. We want to paint them white, did you sand and strip them first, or just use a good primer alone?
Can i just say you guys are absolutely AMAZING! I love your site and all your ideas!! 🙂
I LOVE the kitchen. Love the white. Clean and lovely!
I have been wanting to paint my cabinets, but was under the impression that I would be sanding for days. Did you guys sand at all or just use that amazing primer and then paint?!
Just watched the video. I love how Shelley kept repeating the word “AWESOME!” It IS awesome 🙂 You did a great job, it looks like a totally different space!
Hi, Layla! I think you’ve finally convinced me to paint my kitchen cabinets. Can you tell me which butcher block counter top you purchased at IKEA for this remodel?
Thanks!
Sure! It was the Numerar countertop, but I don’t see that length (or price) on their website anymore, so maybe it’s only available in stores?
Beautiful, Layla! You AND the room. You’re such a natural on camera!
Wow. I LOOOOOVE THIS!!!!!
It never ceases to amaze me how y’all can pull such huge and stunning transformations from simple changes, and skillful painting. I mean, you’re able to create such amazing visions, in rooms, or with one little lamp without the extreme demo and budget you see on TV…. It’s really stunning. I’m wildly impressed.
Wow, that was a great transformation and I loved your video. Congratulations on a job well done and taking it to the next level with your videos!
That’s incredible! The kitchen, Layla -you have a special talent for kitchens. 🙂
This is just all kinds of wonderful! Another home-run for The Lettered Cottage.
Hi Layla,
Did you mention if your husband cut the hole in the wall.
Karmen
Hi Karmen,
Tommy and Shelley’s contractor cut the hole in the wall and finished it back up for them! 🙂
loved the video and your blog. My kitchen is very similar with the exception of the wall color. The previous owners painted every room tan. Which isn’t terrible but after being in the house for a year it now seems a little dark and drab. What was the color you used?
Thanks, Kylie! It’s Comfort Gray by Sherwin-Williams! 🙂
I think it turned out wonderful. Wow so clean and bright.. what a happy difference this has made, love it.
What color is the granite?
Beautiful kitchen! Did you distress the cabinets by hand or with a power sander? Thanks for the inspiration.
Love the cabinets. I am getting ready to do something similar with mine. I didn’t happen read or see in the video that you used any finish on the cabinets…is that correct?
Love the cupboards. Question??????? When the plywood was placed around the cabinet, how did you keep the gap along the top arch from showing up underneath?
Thanks, Vicky! We covered it up with the plywood. 🙂
I just figured out the answer to my previous question about the gap. DUH!
However, another couple of questions.
#1 Did you have any trouble with the hinges not closing correctly? I read another blog and they chromed theirs due to not being able to get new ones to work correctly.
#2 Also, no sealer needed with the Pro Classic Latex Enamel from Sherwin Williams?
Hi Layla,
Quick questikn for you. I just recently started to paint my stained cabinets. Everything looks good, except I’ve noticed that some of my doors and drawers are sticking and causing the paint to chip. I am so discouraged. Insert frowny face here. I googled this problem to death and it seems like felt pads might be the answer to my problem. Did you have this problem with your painted cabinets and do you think the felt will help? Thanks, Kim
Hi Layla, this is gorgeous. My husband and I are buying a home with a very similar kitchen to the “before” and hoping to make this transformation! I notice the grout lines on the floor in the before pictures are much darker than in the after pictures. Did you just clean them, or did you stain them a lighter color somehow? Ours are way too dark!
Hi Layla!
I am in LOVE with this kitchen! We are getting ready to start painting ours white, and the color/finish you used on these doors is exactly what I am looking for! Can you please share the color white you used, and what type of finish?? Thank you so much!
Hi Layla! I also painted my kitchen this color… but know we are stumped as to what to paint our dining room and living room. Our home is a 2 level Charleston style home where the floor plan is completely open on the bottom, with only arch ways separating the kitchen from the dining and the dining from the living. I not better than to paint the entire down stairs one color, but like I said before I need some suggestions on paint colors that compliment Comfort Gray. Do you have any? Thank you in advance!
Hi Layla,
I love the cabinet transformation! What width did you cut the thin plywood? I watched the video and read through the comments but couldn’t
find it anywhere. Thank you!
Thanks, Stacy! I think it was 1/4″ thick plywood. ? Maybe 1/8″? We got it at the home improvement store, and I can’t remember exactly- I’m sorry! 🙁
Hi Layla! I meant the width of the strips when you are facing the cabinets. Like 3 inches, 2.5 inches? Sorry.
Ohhhh! I will have to measure the next time I’m over there. I can’t remember that either- LOL! 😀
WOW! I read over this when Shelley first posted it on Facebook and have now returned to it to try to get some pointers to do my own 1970’s kitchen….. HELP! OLD style cabinet doors, “Butcherblock” laminate countertops, linoleum flooring….YUK! Being on a small budget and needing a redo really bad, I wanted to try to figure out how you framed the cabinet doors and I remembered you mentioning the paint that you purchased at Sherwin Williams. If you fell it is worth the money (and you did state that you were not paid to say how awesome it was) , I want to use it. That will be much cheaper than NEW cabinets. I was also in a dilemma as to whether to use bronze of nickel hardware and I just noticed that you used the bronze so that answered that question. Thank you so much for your help!!!
I also have a question…… my cabinets are currently painted. What type preparation would you suggest before starting this same project with my cabinets? Thanks again! 🙂
Hi Layla, Beautiful kitchen! Can you tell me the name of the granite countertop? Thanks!
Thank you, Cindy! The granite was there before Tommy & Shelley moved in, so I’m not sure what kind it is. I’m sorry! 🙁
I love this kitchen redo (Tom &Shelleys). Can’t seem to find the episode or it won’t download Help
Thanks, Jeni! It’s over at TheDesignNetwork.com! 🙂
http://www.thedesignnetwork.com/viewSeries.php?series_id=44
Dear Layla,
I LOVE the cabinets and kitchen transformation!
You are a true inspiration for me and all the projects around my house so first of all thank you so much for being so talented and so unique!
I am about to paint my kitchen cabinets as you did for Tommy and Shelley kitchen (currently orange oak). I noticed that you lightly distressed them as I would like to do.
Could you please tell me if you used any wax or polyurethane after that?
Thank you so, so much!
Monica