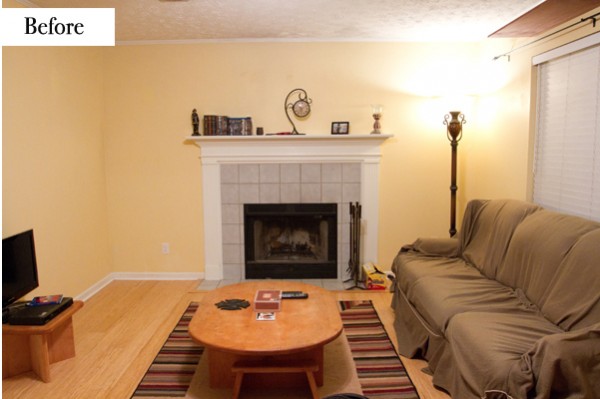
It’s been a busy summer so far, but I’m excited to get back to work on Keith’s living room makeover next weekend! If you’re just tuning in, here’s a look at Keith’s ‘before’ photo:
…and here’s the inspiration photo I put together using Photoshop:
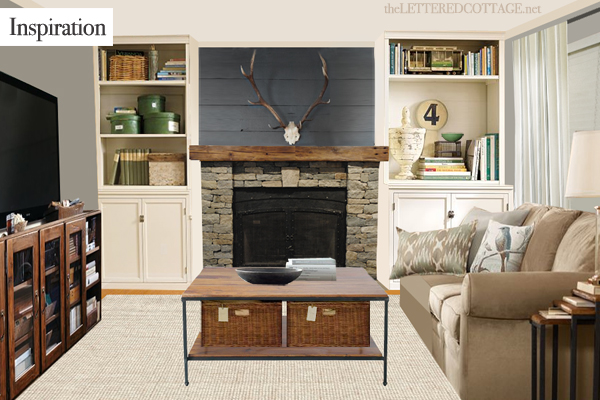
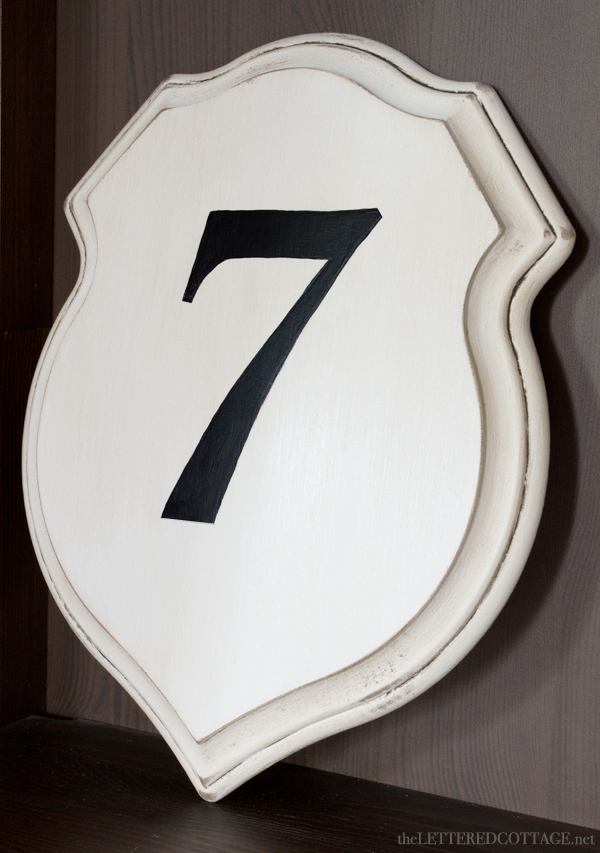
Keith is a firefighter at station #7, so I decided to make a DIY sign like the #4 one in the inspiration photo.
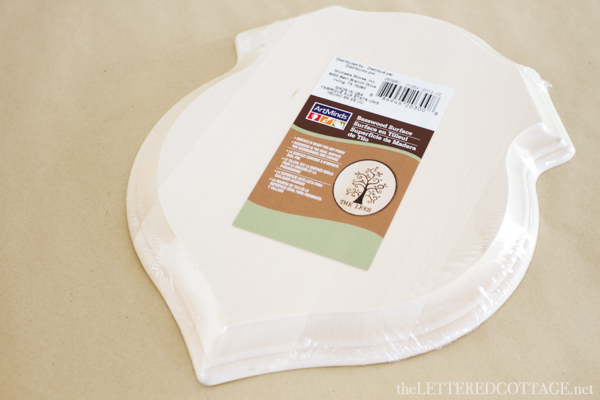
First, I went to Michael’s to pick up a round piece of wood, but I found this one that sort of reminded me of a badge and decided to go with it instead:
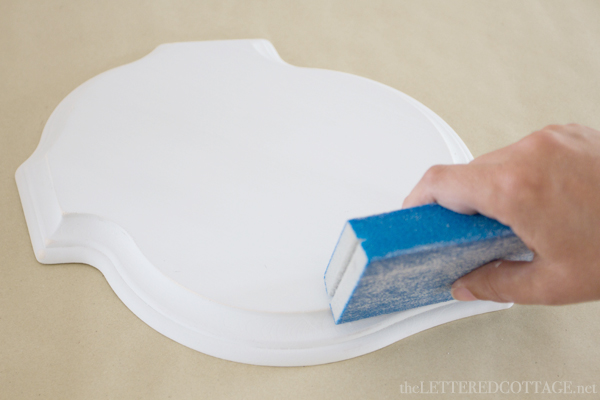
I started by painting it with a few coats of (leftover) Sebring White paint…
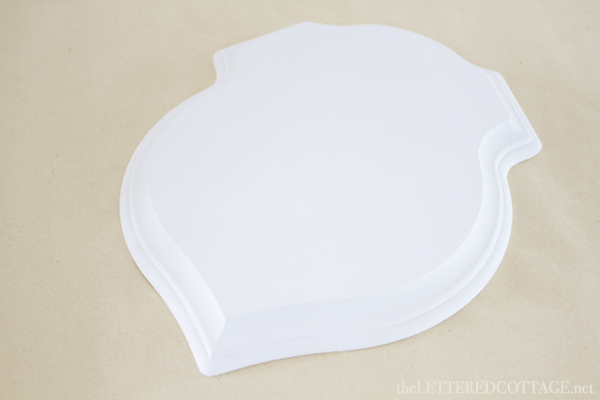
…then I sanded the edges with a drywall sanding block:
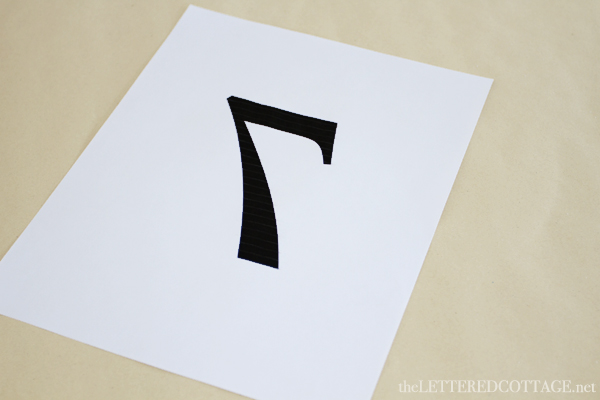
Next, I printed out a backwards number 7…
…and cut off most of the paper around it. I used a pencil to put some lead on the outline of it…
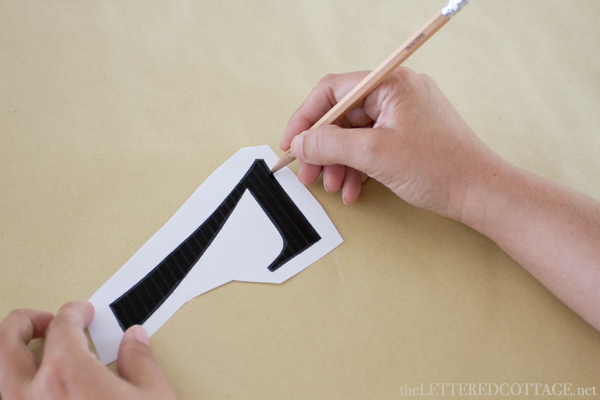
…then I taped it in place on the front of the sign and rubbed more pencil lead on the top side of the 7 so that the lead underneath would transfer onto the face of the sign:

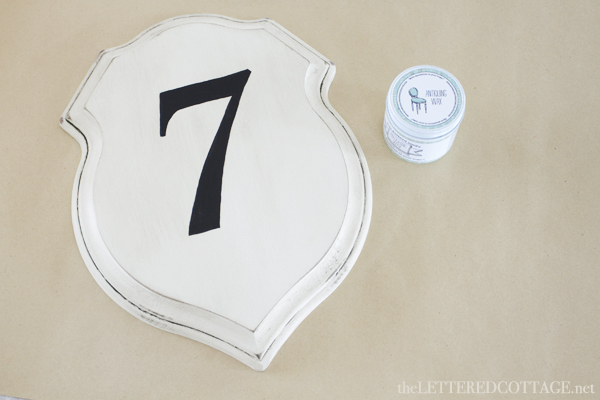
I filled in the 7 with a little paint brush and some black craft paint, and last but not least, I used an old t-shirt to rub some of Miss Mustard Seed’s antiquing wax onto the entire surface of the sign:
I’m going to use some sticky-backed velcro to attach the sign to the back wall of one of Keith’s bookcases when we head over there to work on the room again next weekend.
We’re partnering with a company called SkimStone to give Keith’s hearth a concrete makeover, so I look forward to blogging about how that turns out, soon!

For pics between posts, join us over on Twitter, Facebook and/or Instagram!


I LOVE it!!!! and Keith will too!!! can’t wait to see it in person and can’t wait to see you two next weekend! 🙂
I was at Target earlier this week and they have Command brand Velcro type picture hanging packs. I haven’t tried them yet, but if they’re like their other products, it will be comforting to know that I can take them off without damaging the wall.
Ok, as far as tutorials go, I CAN DO THIS!! Cannot wait….favorite #s are 4, 6, and 12……better get busy!! I have tons of scrap wood lying around too;) ~ Kim
Hey Kim
Even easier…rather than hand paint your numbers, simply print them out, cut around them then decoupage ’em straight on. Course if you wanna hand paint them then that’s pretty simple too! Have fun 🙂
Hey Layla.
Very cute, I love the shape of the plaque.
I’ve added letters and numbers to quite a few of my décor items in the past, though rather than hand paint them, I usually cut them out and decoupage them straight on. Saves having to concentrate on staying in the lines!
What a great idea! Thank you for sharing. I can think of many reasons to use this,
Absolutely gorgeous! I love it!
Hi Layla!
I can’t wait to see the reveal of Keith’s room. I’ve been waiting to see what you think of working with the Airstone as I’ve seen it in Lowe’ s and was thinking of using it in my home. Have you changed your mind about using it for Skimstone or are you using both? If you’ve changed your mind about using it, why? Thanks for sharing your style with us! I love it!
Hi Wendy!
We’re using SkimStone on the hearth and AirStone on the facade. Hopefully it’ll turn out like I see it in my mind! 😀
Love this! Super cute.
You had me with the shape of wood you chose!!!!!!! David’s and my fav number is 8. I have just the perfect spot for our number to be on display! I bet Keith is giddy with excitement over his home!
This is BETTER entertainment than on t.v. Thanks kids!
Personal symbols like that are what make the heart in home. Your designs are always thoughtful and sentimental. So important.
The number 7 sign LOOKS SO AWESOME, he will love that. Did you sand again after you painted with the white/ (sorry if I didn’t pay attention and read it correctly:) If not is that what the Miss Mustard Seed Wax did??? I love that finished look, makes it look SO vintage,,,.love that!!!
Hi Lisa! I did sand it after I painted it white. That’s how I exposed the edges so that the antiquing wax could soak in. Fun stuff! 🙂
Hi Layla, this is great, and I think even I could do this
(The rest of my message was cut off.) My kid’s favorite number is 3, so this will be my project of the week. Thank you for the great idea!
That’s really cute…and simple! And cheap! 😉
great tutorial…it turned out wonderful..I can’t wait to see more of what you guys are doing at his place!
Wow! So simple, but so effective!
I always wondered how to transfer. This could be useful information someday. I can’t wait to see how his living room turns out. It was in need of a little designer touch.
I never would have thought to use a stencil like that with only a pencil scratching. That’s ingenious! I usually hand paint things on projects like this but what you did is so simple and makes wayyyy more sense. Thank you 🙂
Love numbers in home decor!
Waiting (impatiently) for the reveal on this. Take lots of pictures!!!
Hi Layla,
At what point do you distress the edges and how do you do that. It’s probably so simple but I’ve always wondered how to get the edges of things/furniture to have that old/worn off look.
Thanks.
Hi Karen!
I sanded it in step #2- right after I painted it white. I just used a drywall sanding block to reveal the wood underneath on the edges a little. 🙂
We stumbled across your blog page today, and absolutely adored it! You guys are very engaging! We absolutely love this DIY craft. We will be stopping by every couple of days to see what you have to say! Thanks for such great material! PureHome Team
Thanks for sharing such a great idea! I love projects that are cheap and easy, but meaningful! I used this idea to make one for our office gallery wall:
http://thejunkhouse.blogspot.com/2013/08/diy-number-14-sign.html
Love this! Thinking that this would be cute on a gallery wall with the number of family members…and maybe do another shape with a monogram…would break up a wall of photos and personalize it!!